Organization Details
The Organization Details screen is where you manage everything about a specific organization in Teknora EAM: the organization's own data, its Sites, and a full interactive geographic map (3D/GIS) of all its locations. This screen opens from the Organizations list by clicking any row.
Toolbar
| Button | Function |
|---|---|
| Back (arrow) | Returns you to the Organizations list |
| Navigation arrows (◀ ▶) | Move between organizations: first/previous/next/last record |
| Save | Saves all changes across all three tabs at once |
| Paperclip (📎) | Organization attachments (only shown once the organization has been saved) |
| Trash icon | Permanently deletes the organization (if you have permission) |
Organization Tab
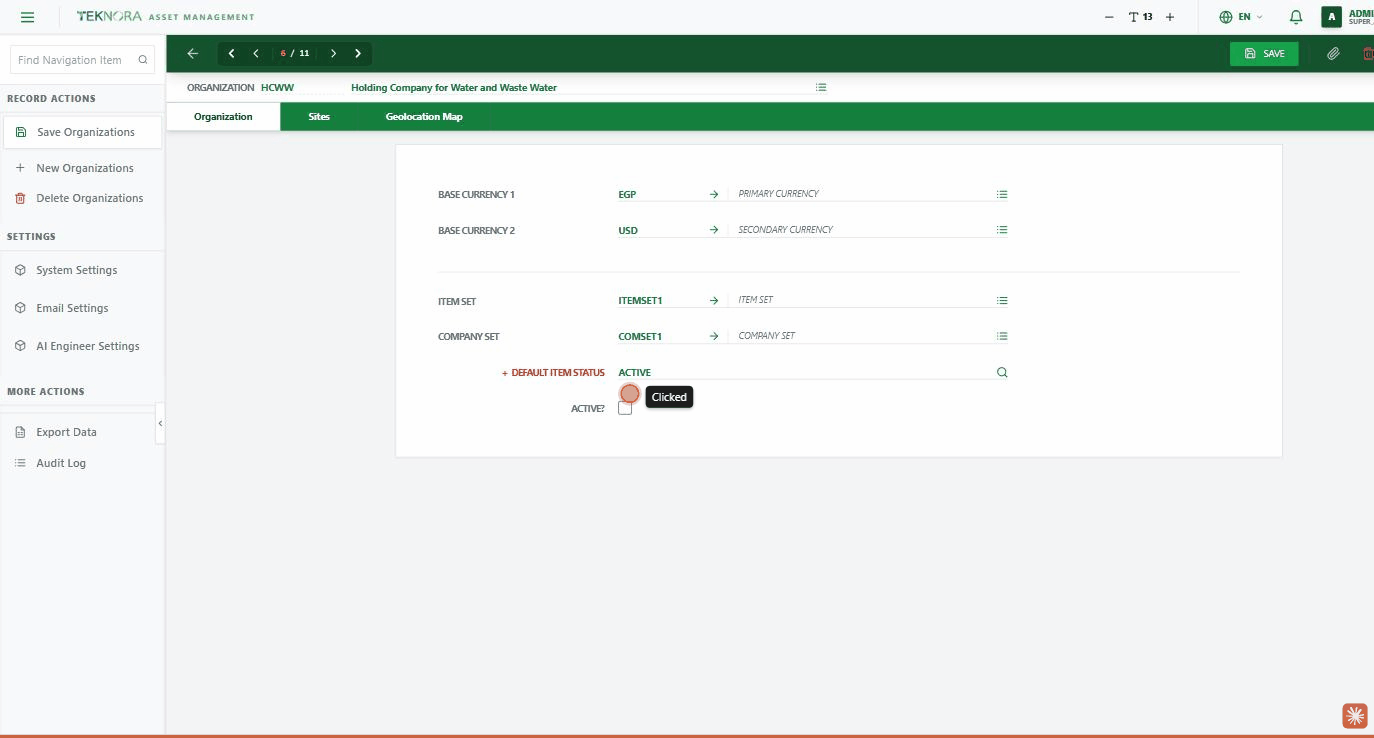
The organization's core fields:
- Base Currency 1 / 2: the organization's two currencies (primary and secondary), linked to the currency domain.
- Item Set / Company Set: which Item Set and Company Set the organization uses.
- Default Item Status: the status automatically applied to any new item linked to this organization.
- Active?: enable/disable the organization.
Sites Tab
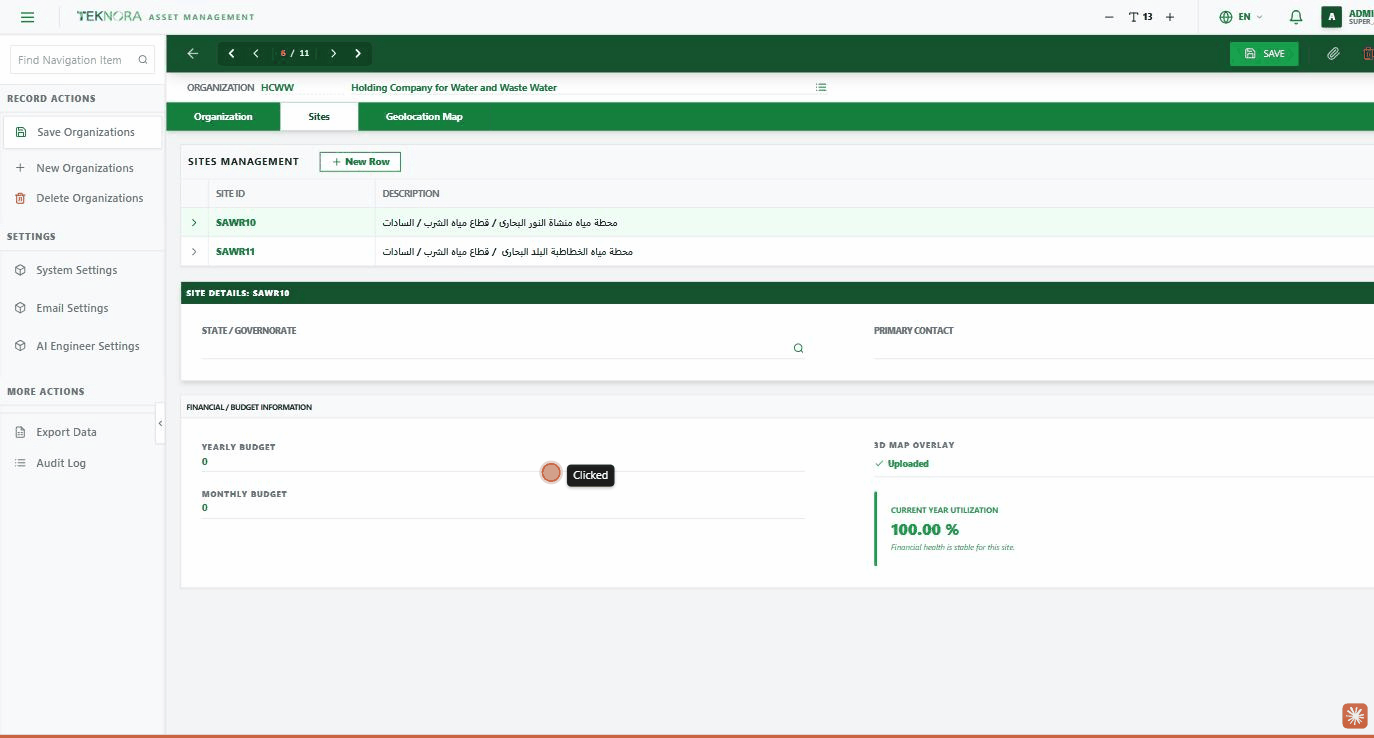
Each organization can have more than one Site under it — like a branch, plant, or building. The top table lists all sites, and clicking any row opens its details below:
- Site info: State/Governorate (searchable), Primary Contact.
- Financial info: yearly and monthly budget, and a Utilization percentage calculated automatically.
- 3D Map Overlay: upload an image (a building floor plan, a cropped satellite image, a blueprint) that gets placed over the site on the Map tab, exactly aligned to its coordinates — very useful for showing site details that aren't visible in a regular satellite map.
Click New Row to add a site, or the trash icon on a row to delete it.
Geolocation Map Tab
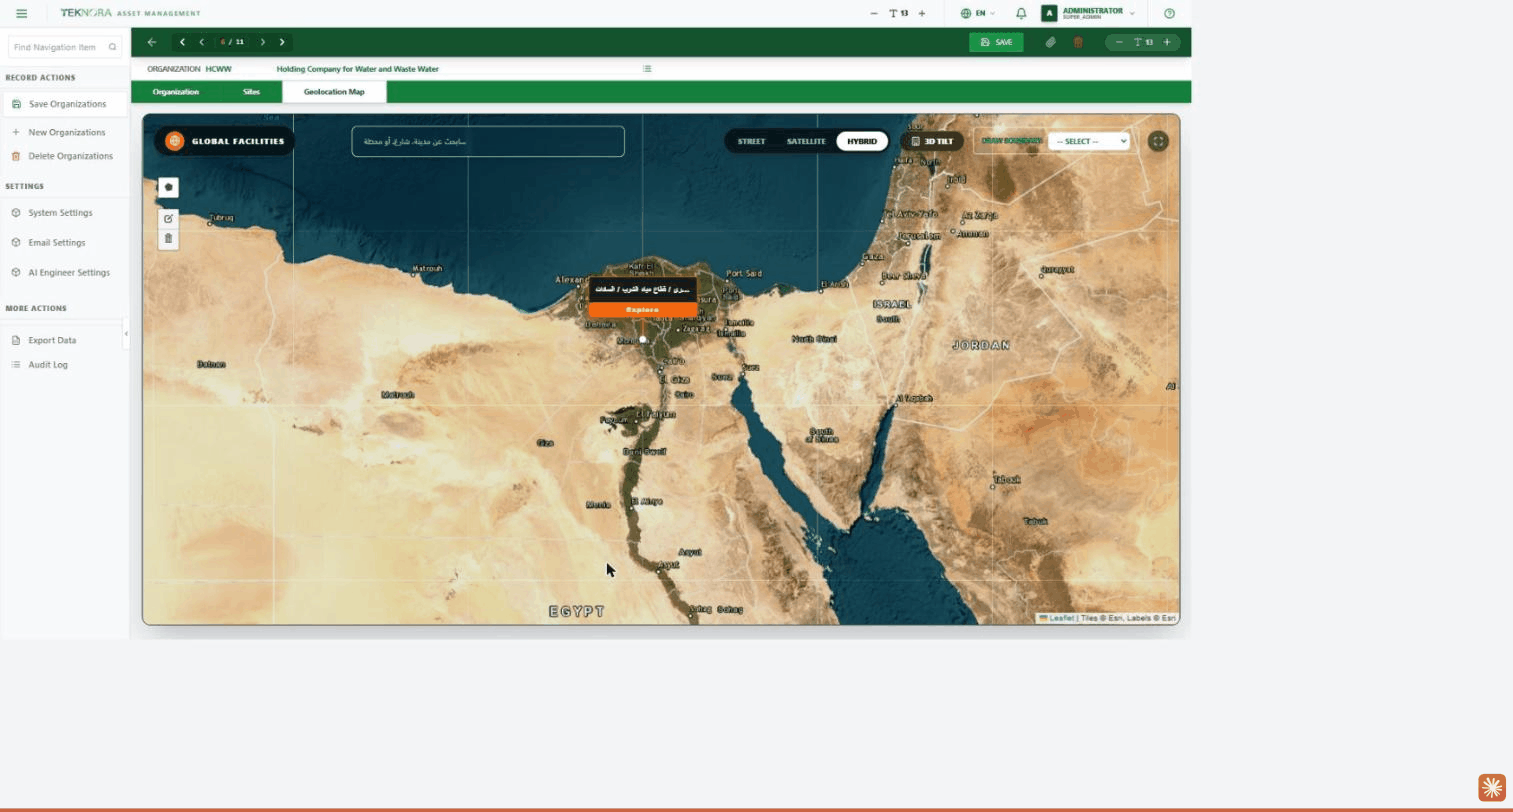
A full interactive map (built on Leaflet) with two levels:
- Macro view (Global Facilities): the whole world map, with every site shown as a point — click "Explore" on any point to drill into it.
- Micro view (inside a specific site): shows all assets and sub-locations inside that site, with a sidebar listing them.
Map tools:
- Street / Satellite / Hybrid: switch the map's display style.
- 3D Tilt: tilts the map into a 3D perspective.
- 3D Overlay: if the site has an uploaded image (from the Sites tab), you can activate it as a layer over the map, aligned exactly to its coordinates.
- Draw Boundary: pick a site from the dropdown and draw its boundary on the map (a polygon) — it's saved automatically as the site's coordinates.
- Search: search for any place in the world and the map flies straight to it.
- Fullscreen: expand the map to fill the whole screen.
Sidebar Actions
The sidebar on this screen holds some very important configuration screens you should know about:
Record Actions
Save / New Organization / Delete — same as the toolbar buttons.
Settings
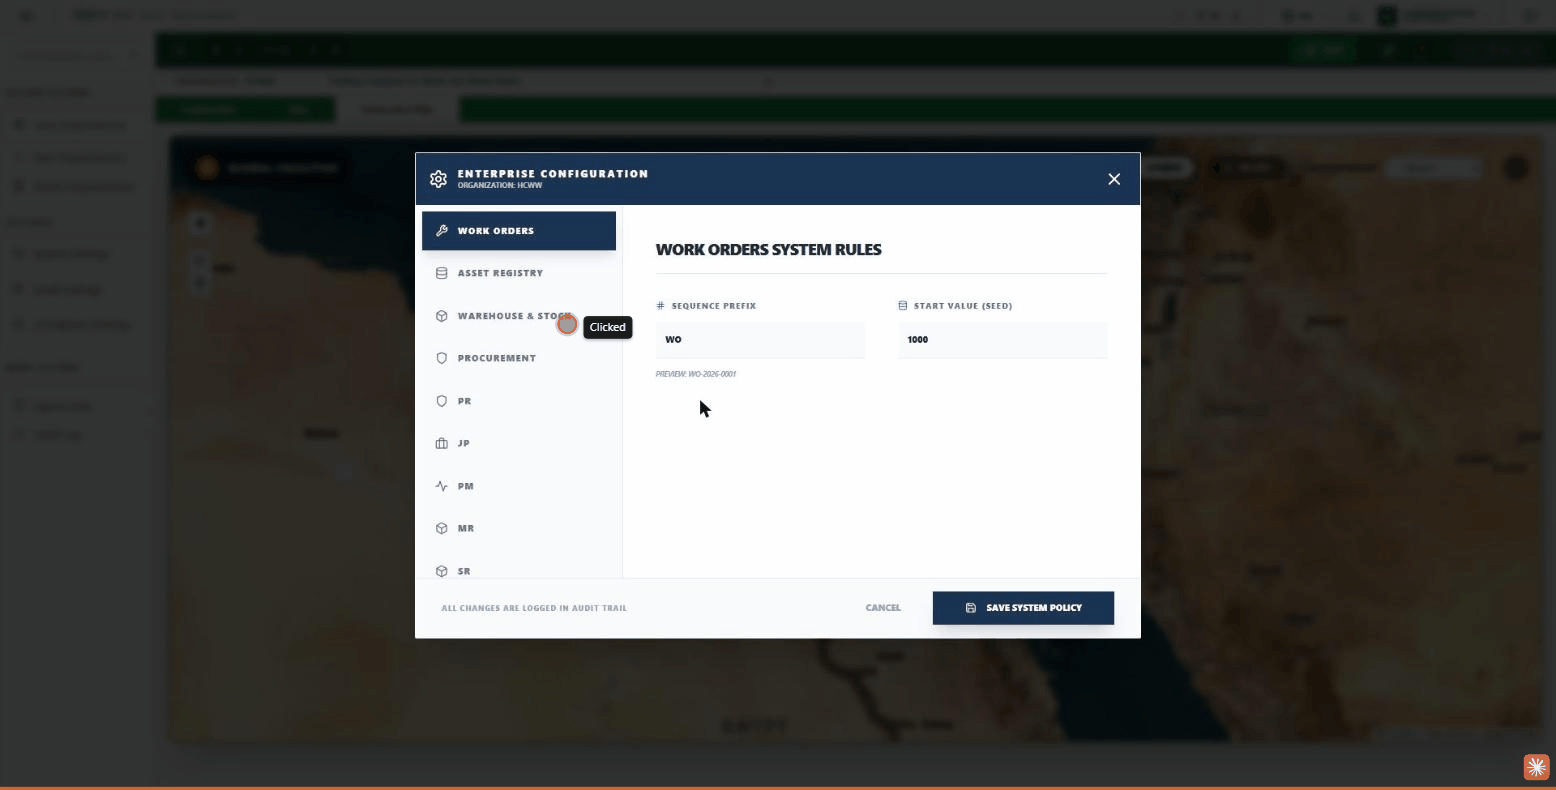
- System Settings: opens "Enterprise Configuration" — this organization's own system rules (each organization has independent settings), such as the automatic numbering prefix (Sequence Prefix) and starting value (Start Value) for each module (Work Orders, Asset Registry, Warehouse & Stock, Procurement, PR, JP, PM, MR, SR...). These changes are logged in the Audit Trail.
- Email Settings: opens "SMTP Configuration" — this organization's outgoing (SMTP) and incoming (IMAP) mail server settings, with an "Enable Inbox Monitoring" option to automatically watch the inbox (useful for vendor quotations).
- AI Engineer Settings:
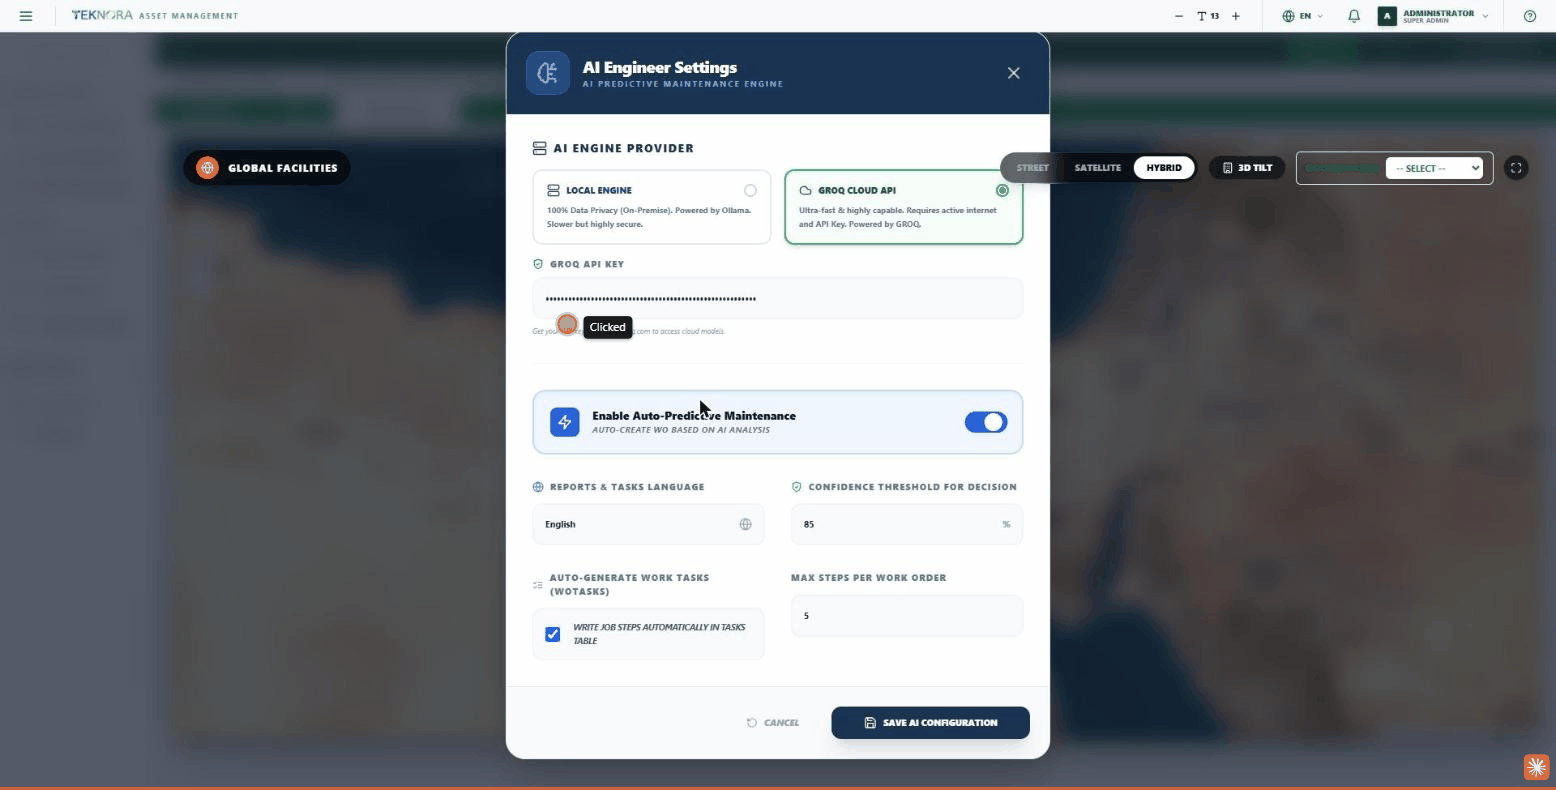
opens the screen for enabling and configuring the AI predictive maintenance engine: choose the engine (Local, 100% private, or GROQ Cloud API, faster), the API key, enable "Auto-Predictive Maintenance" (automatically generates work orders based on AI analysis), the language for reports and tasks, the confidence threshold for decisions, and the max steps per work order.
More Actions
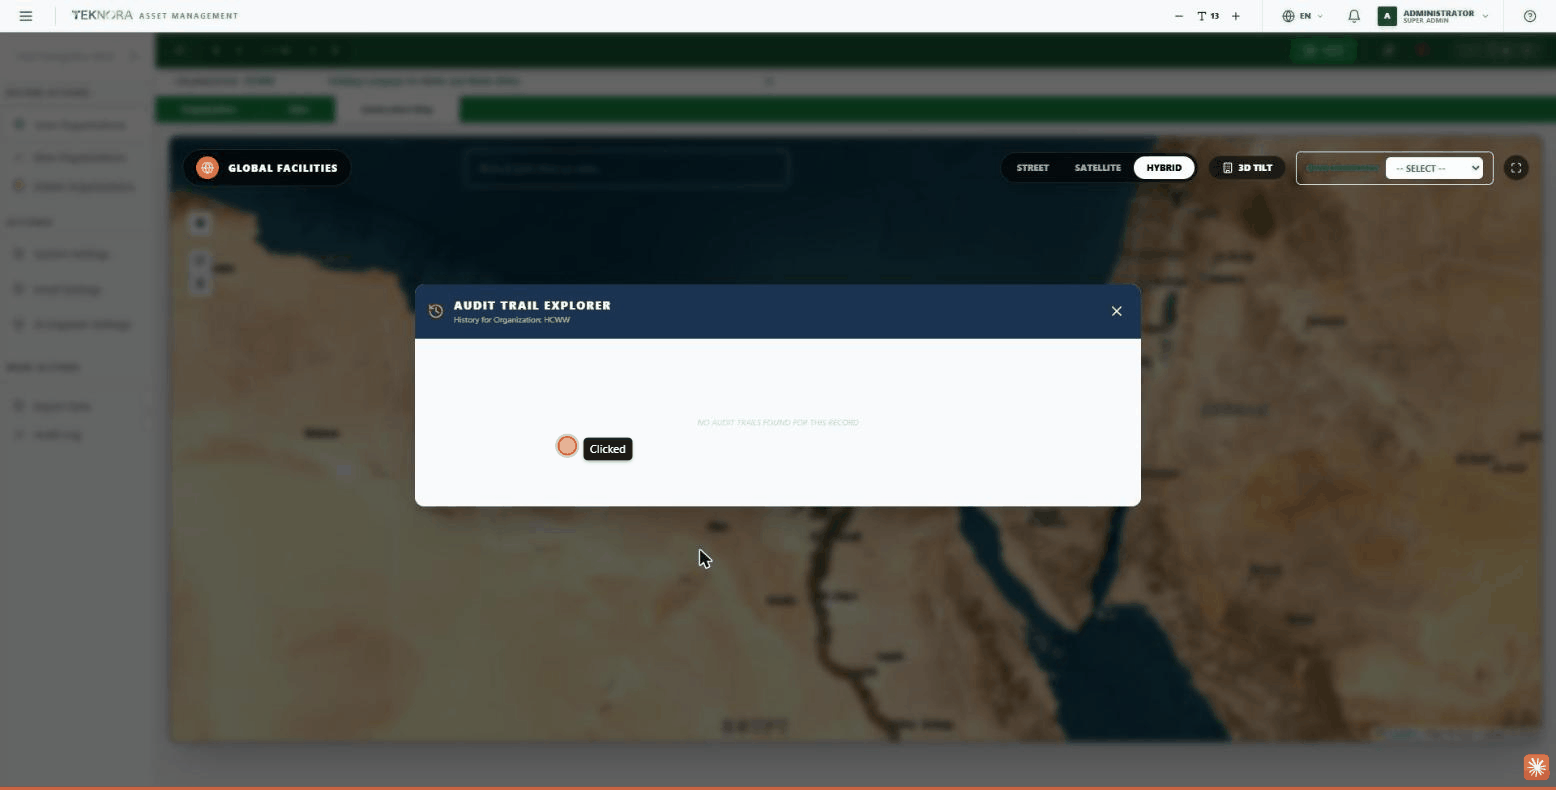
- Export Data: exports the organization's data as a file.
- Audit Log: opens "Audit Trail Explorer" and shows every change made to this organization — who changed what, and when.
Practical Steps
1. Create a new organization
From the Organizations list, click NEW ORGANIZATION, set the Organization ID and description, fill in the rest of the core fields, then save.
2. Add sites
Go to the Sites tab, click New Row for each site, fill in its code and description, then click the row to fill in its detail fields (state, contact, budgets).
3. Set up the map (optional)
Go to the Geolocation Map tab, pick the site from "Draw Boundary" and draw its boundary, or upload a 3D Overlay image from the Sites tab to show internal detail.
4. Configure specialized settings (optional)
From the sidebar, configure System Settings (document numbering), Email Settings (if the organization needs to send/receive automated emails), and AI Engineer Settings (for predictive maintenance).
Before deleting
Deleting an organization is permanent and cannot be undone — make sure no sites or records still depend on it before you delete it.
Back to: Organizations list ←