Job Plan Details
The Job Plan Details screen holds everything about the plan: general info, its tasks and resources (labor/materials/tools), and the assets it applies to. The plan can then be attached to a work order or a PM schedule to save re-typing all these details every time.
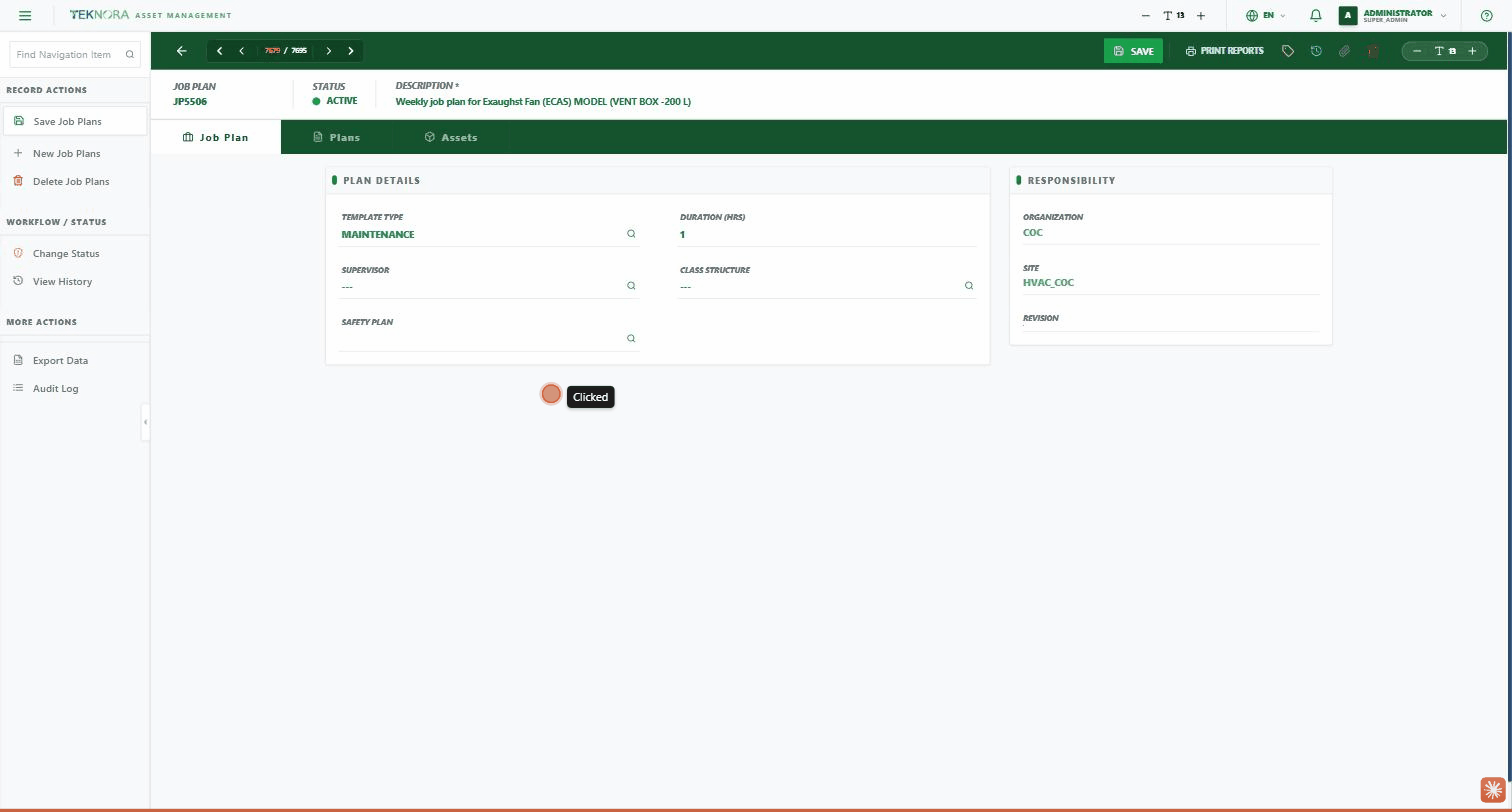
Toolbar
| Button | Function |
|---|---|
| Back (arrow) | Returns you to the Job Plans directory |
| Navigation arrows | Move between plans: first/previous/next/last record |
| Save | Saves all plan data |
| Print Reports | Prints the plan's reports (if defined) |
| Change Status (tag icon) | Opens the status-change screen |
| History | Shows the status change history |
| Paperclip | Plan attachments |
| Trash icon | Deletes the plan (if you have permission and status allows it) |
Job Plan Tab
- Template Type: the plan's classification (e.g. Maintenance).
- Duration (Hrs): estimated time to complete the whole plan.
- Supervisor: the person responsible for overseeing execution.
- Class Structure: the plan's classification within the classification tree.
- Safety Plan: the safety plan linked to this task (if any).
- Responsibility: Organization, Site, and the current Revision number — updates automatically with every new publish of the plan.
Plans Tab
Contains 4 sub-tabs representing every resource needed to execute the plan:
- Tasks: the work steps in order (Task Sequence), each with a description and estimated duration.
- Labor: the craft and labor code needed, with estimated hours for each.
- Materials: the required items, quantity, unit cost, and line cost (calculated automatically).
- Tools: the required tools and their hours of use.
Click + NEW ROW in any sub-tab to add a row, and the delete icon next to a row to remove it.
Assets Tab
A list of the assets and locations this plan is designed to be executed on (Work Assets), plus linking safety plans at the individual asset level when needed. Click NEW ROW to add an asset to the plan.
Sidebar Actions
- Record Actions: Save / New Plan / Delete.
- Workflow/Status: Change Status, View History — the same real status-change system used across the other screens.
- More Actions: Export Data, Audit Log.
Practical Steps
1. Create a new job plan
From the directory, click NEW PLAN. The plan number is generated automatically. Fill in the template type, duration, and supervisor, then save.
2. Add tasks and resources
Go to the Plans tab and add the tasks in order, then the labor, materials, and tools each task needs.
3. Link assets
If this plan is meant for a specific asset or group of assets, add them from the Assets tab.
4. Publish and use
Once everything checks out, save the plan and change its status to ACTIVE so it becomes available to attach to work orders and PM schedules.
Revising vs. editing
Editing a job plan after it's already been used on past work orders can cause mismatches — prefer creating a new Revision rather than directly editing an active, in-use plan.
Back to: Job Plans Directory ←