Custom App Studio
The Custom App Studio is a low-code builder inside Teknora EAM. From it you can add a brand-new "app" — a data model plus a list screen and a details screen — without writing code, lay it out by drag-and-drop, and translate it into any of the system's 11 languages.
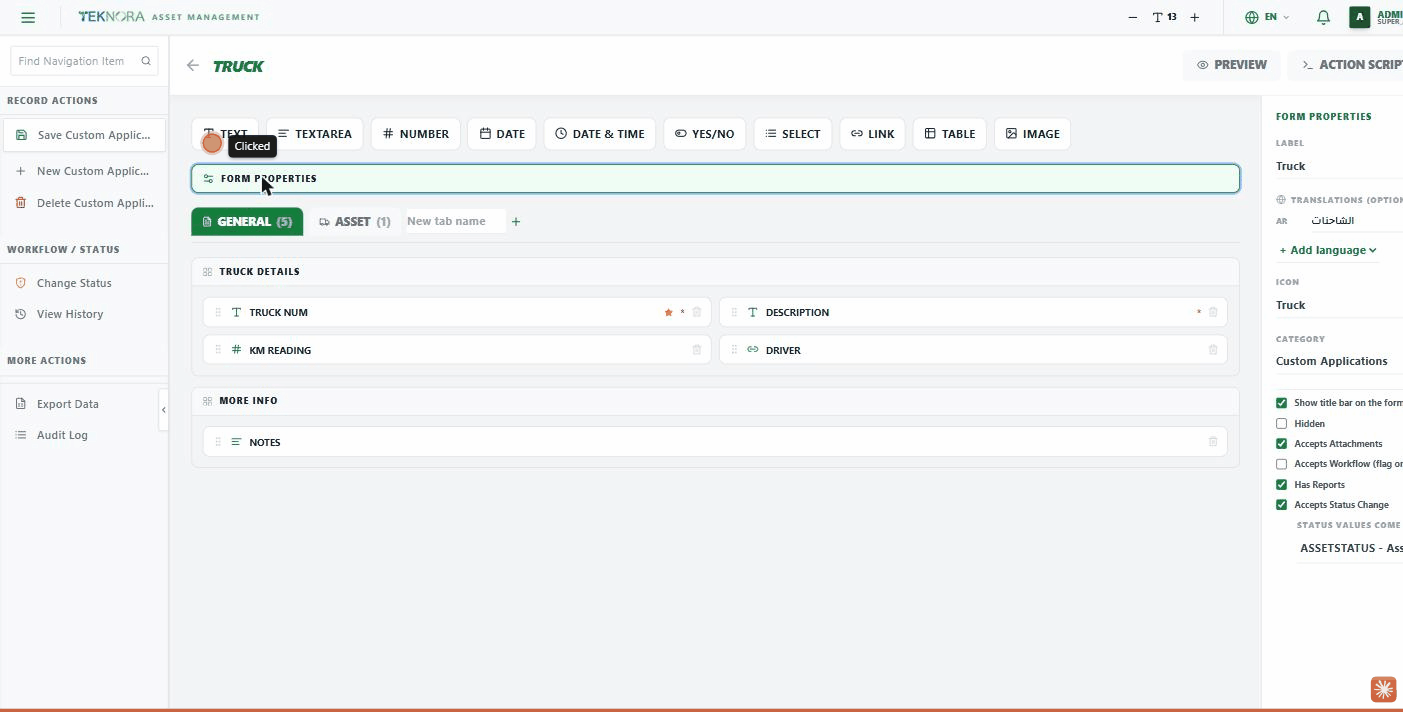
Main Areas
The screen is split into three areas:
| Area | Purpose |
|---|---|
| Top bar (field type palette) | Buttons to add a new field to the current tab — Text, Textarea, Number, Date, Date & Time, Yes/No, Select, Link, Table, Image |
| Canvas (center) | A live (WYSIWYG) preview of the form — what you see here is exactly what the user sees at runtime |
| Properties panel (right) | Automatically switches based on what you click on the canvas — the whole form, a tab, a section, or a field |
Form Properties
Click the "Form Properties" bar above the canvas to see the app's overall properties:
- Title: the app's primary name (shown in the sidebar and top menu).
- Translations: translate the app name into any of the 11 languages — a user running a translated language sees the translated name automatically.
- Icon: an icon name from the lucide-react library.
- Category: how the app is grouped under "Custom Applications".
- Show title bar in form: controls whether the app name + primary field + description field show in the details screen header.
- Hidden: hides the app from the sidebar and menu without deleting it.
- Accepts attachments: adds an attachments icon (📎) to the details screen header.
- Accepts workflow: intent flag only for now — no real workflow engine wired up yet.
- Has reports: enables the real "Print Reports" button on the details screen, and makes the app selectable as a data source in Report Designer.
- Accepts status change: enables the real status-change system (the same one used on the Assets and Work Orders screens) — you'll be asked to pick a domain the status values come from (e.g. ASSETSTATUS).
Tabs
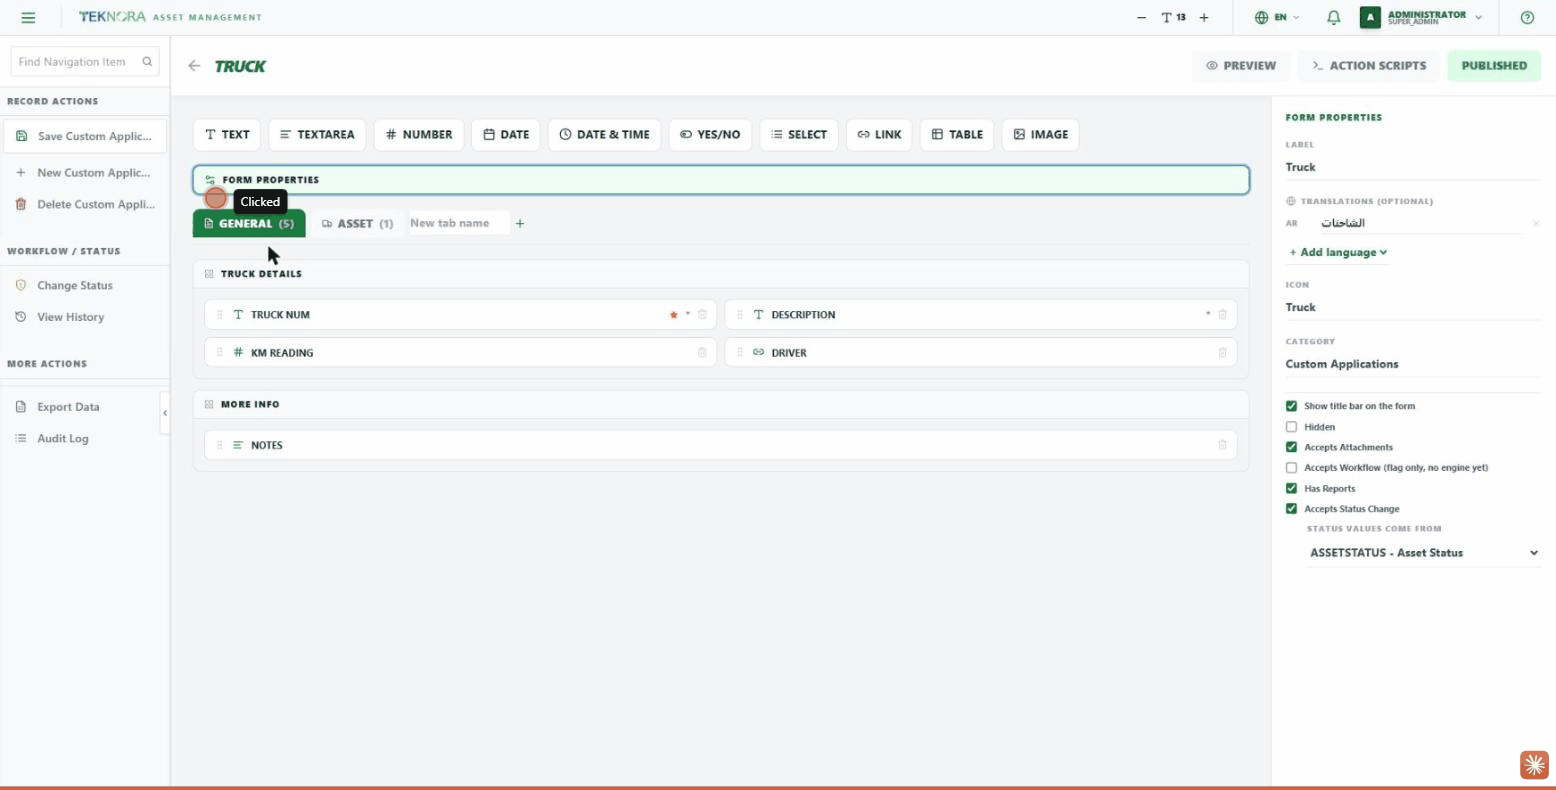
Click any tab on the canvas to edit its properties:
- Name: the tab's label as shown to the user.
- Icon: a dropdown with a ready-made icon grid to pick from — it appears next to the tab name on the canvas and on the details screen at runtime.
- Translations: translate the tab name into any language.
- Hidden: hides the entire tab from the details screen without deleting the fields inside it.
Click "+" next to the last tab to add a new one.
Sections
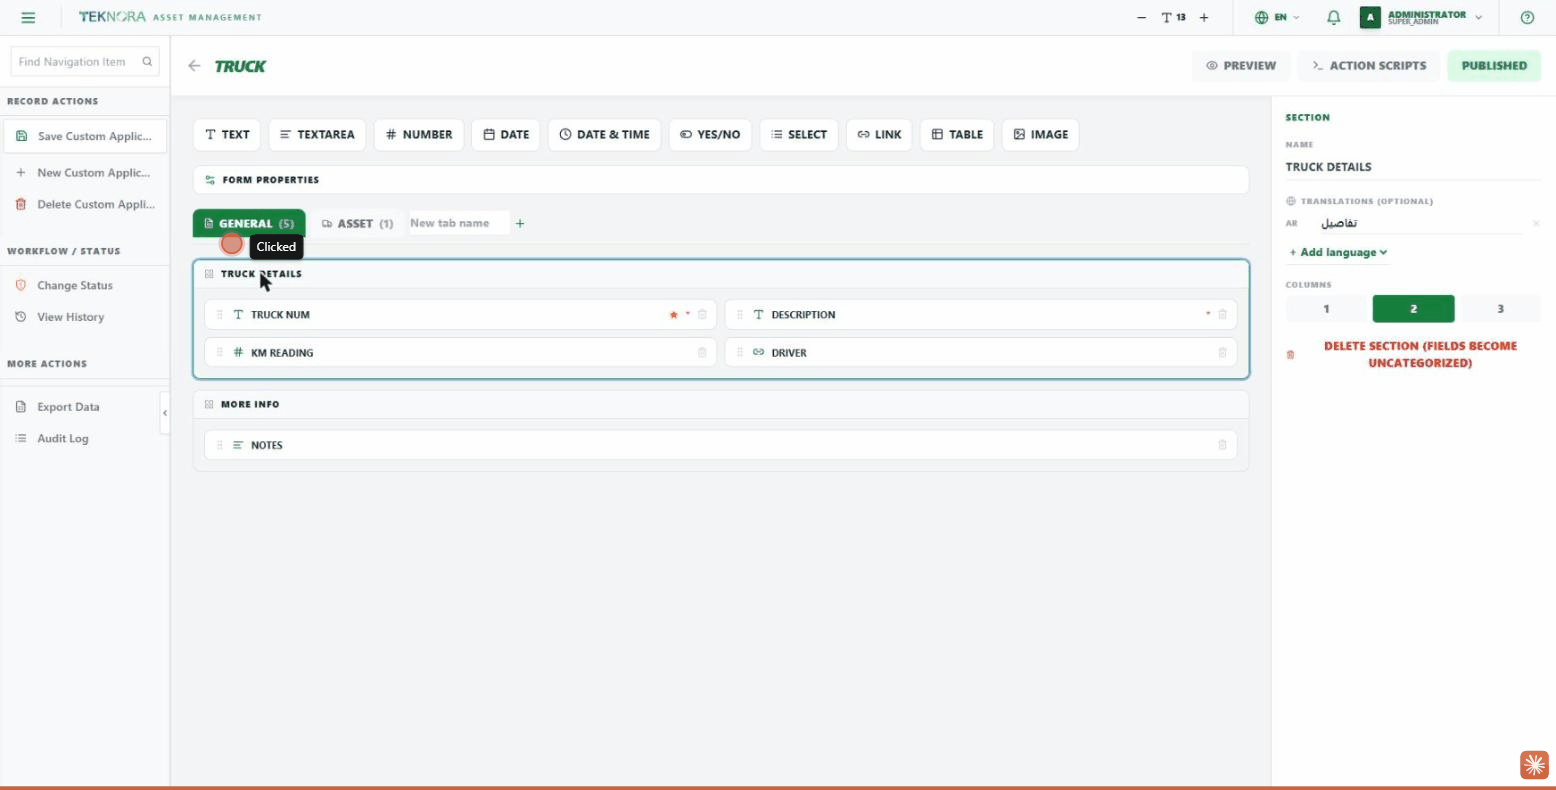
Each tab is divided into sections (groups of fields). Click any section's title to:
- Change and translate its name.
- Set its column count (1, 2, or 3) — this drives the actual CSS Grid the form is laid out with, not just an approximate look.
- Delete the section — its fields become "unassigned", they are not deleted.
Fields
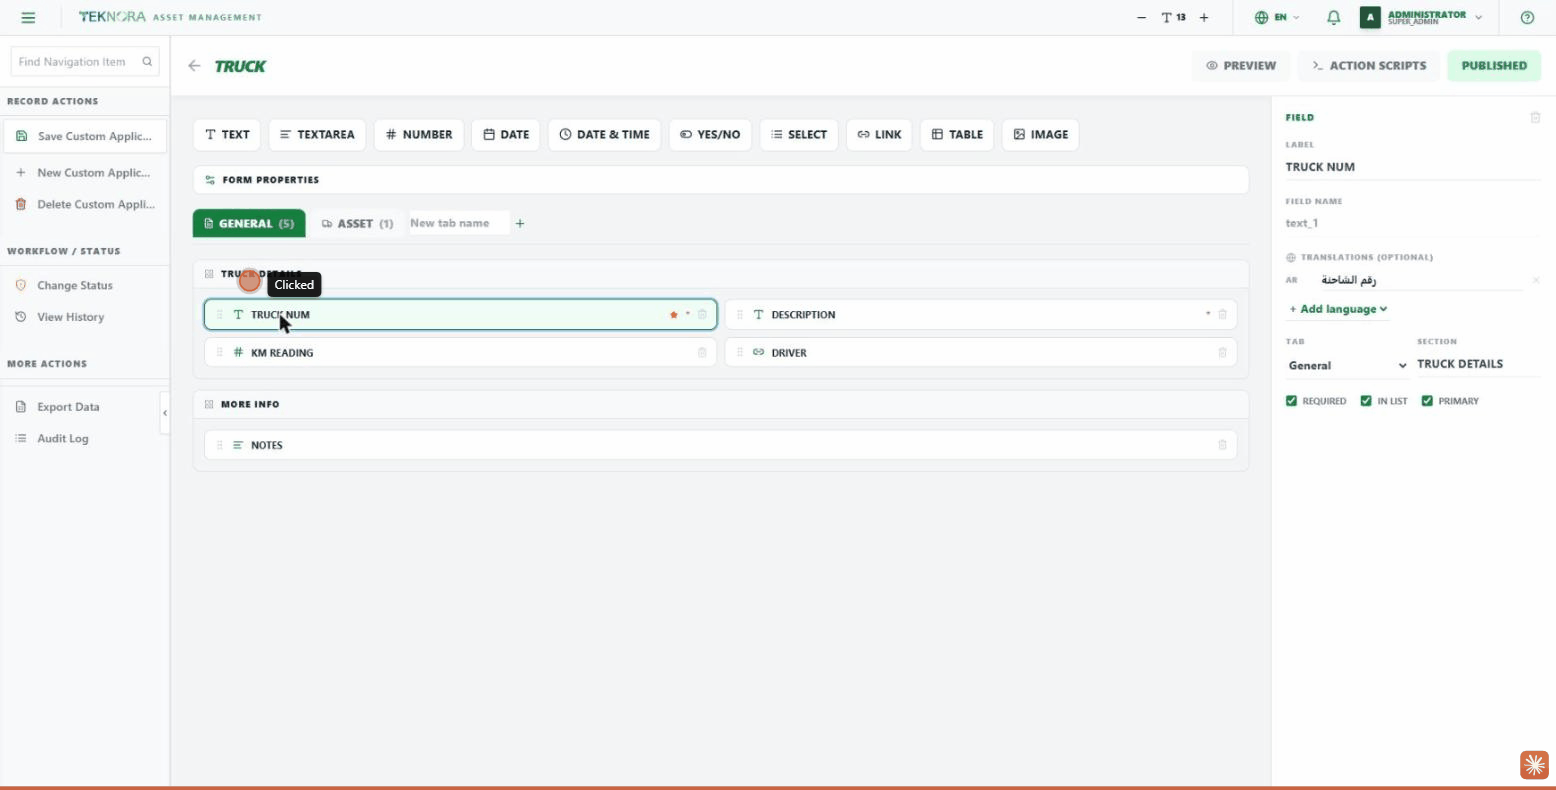
Click any field to edit:
- Label and field name (the field name is auto-generated and not editable).
- Translations — same idea as tab translation.
- The tab and section the field appears in.
- Required: enables real (native HTML) validation — the record cannot be saved without it.
- Show in list: controls whether this column appears on the list screen.
- Primary: the main field that represents the record's "title" — it's shown in the details screen header instead of being repeated in the body, and it locks (becomes non-editable) after the first save.
- Read Only: the field is displayed but can't be edited by hand — useful for a field an Action Script controls (like an automatically-computed total).
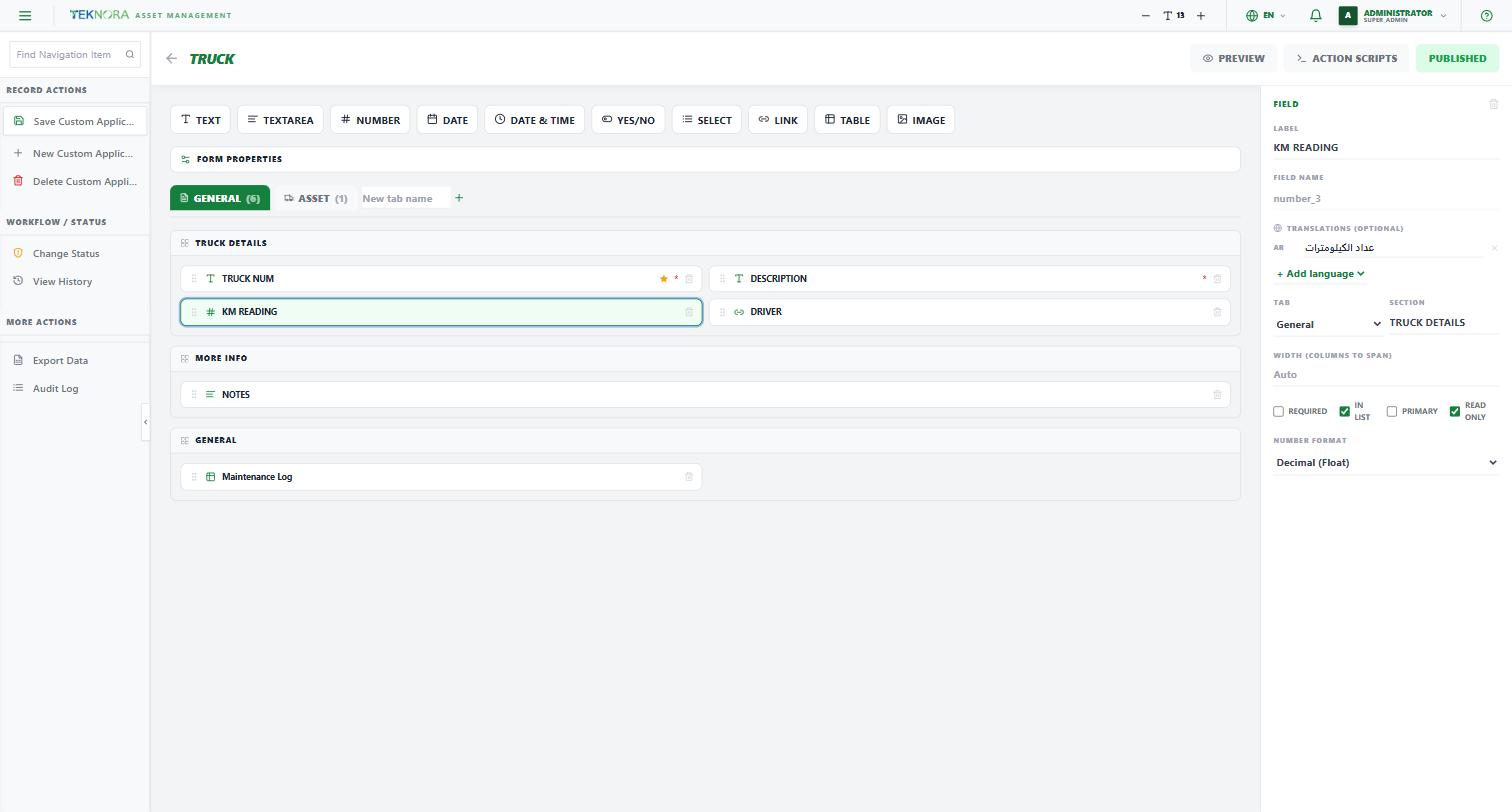
If the field type is Number, an extra option appears:
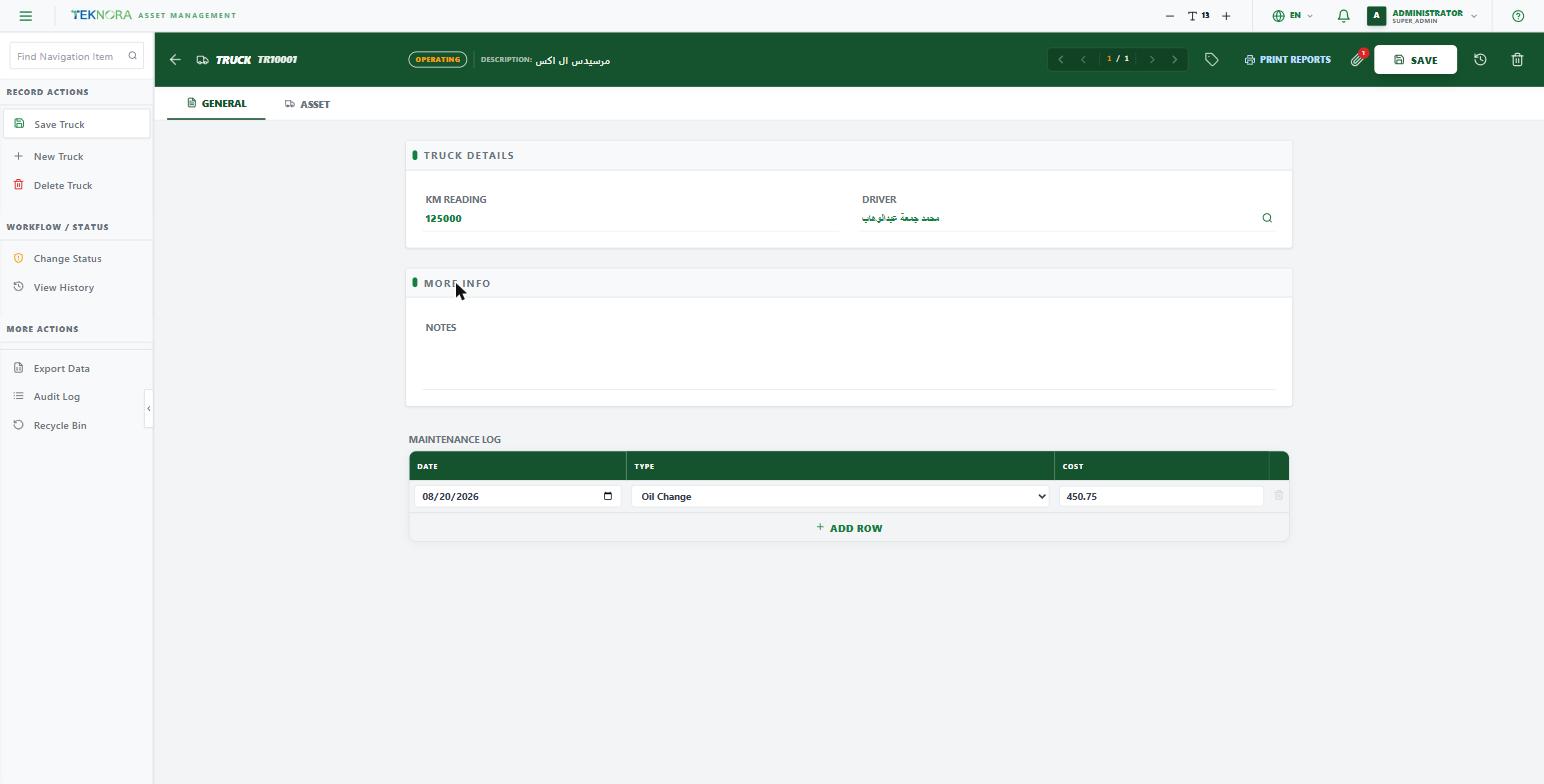
- Number Format: Integer (default), Decimal (Float), or Currency — choosing Decimal or Currency lets the field accept fractions normally (like 450.75) without the browser flagging it as "invalid".
Field Types
Besides the simple types (text, number, date, yes/no, select from list), there are two advanced ones:
Link field
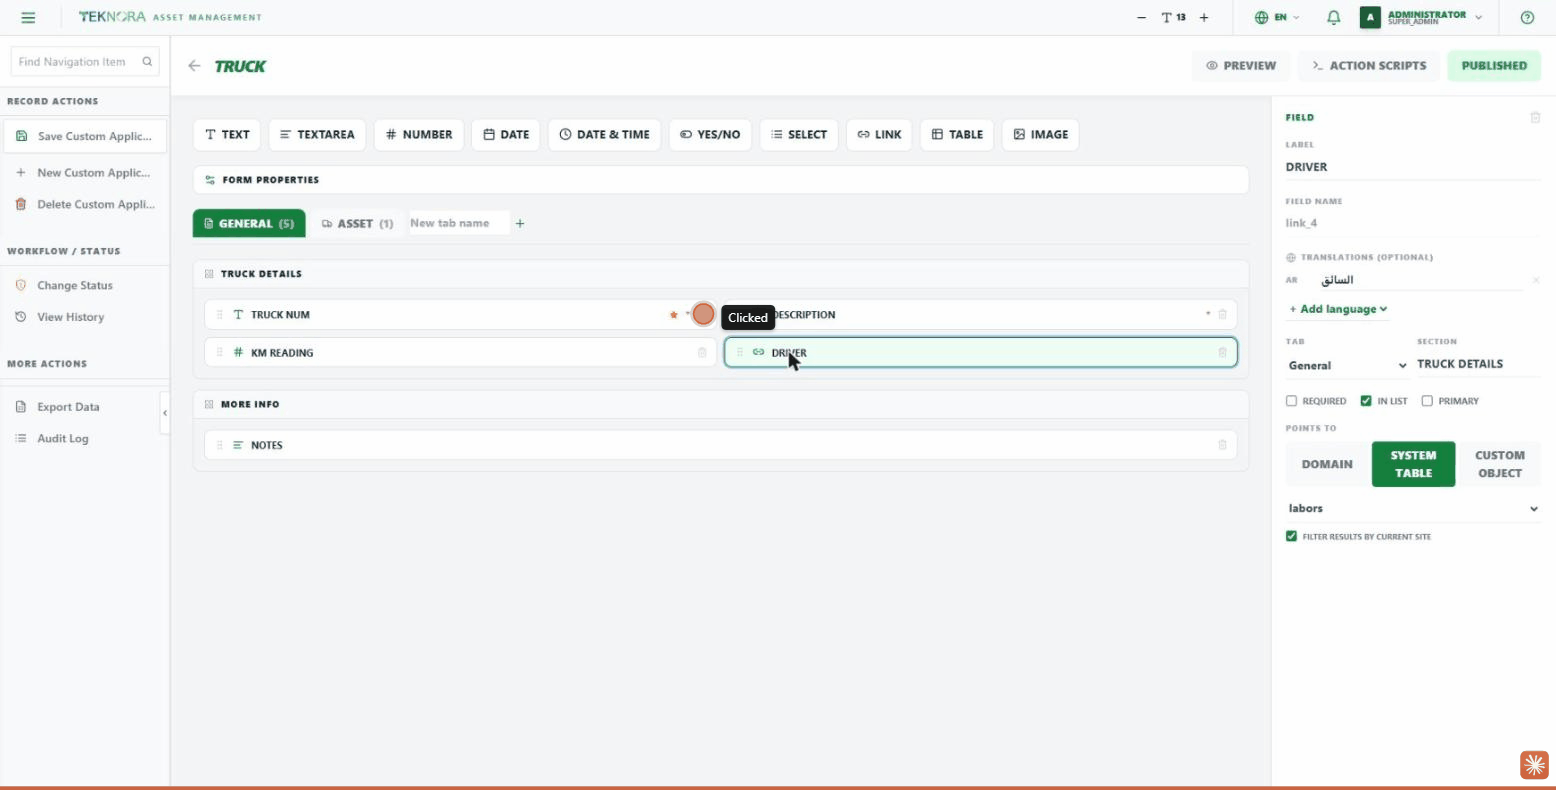
A field that points at a real record somewhere else instead of being free text. You can choose for it to point at:
- A domain: any domain in the system.
- A system table: a real table such as Assets, Locations, Items, Labors...
- A custom object: another custom app you built.
There's also a "Filter results by current site" option — if enabled, the search only returns results belonging to the user's own site.
Table field
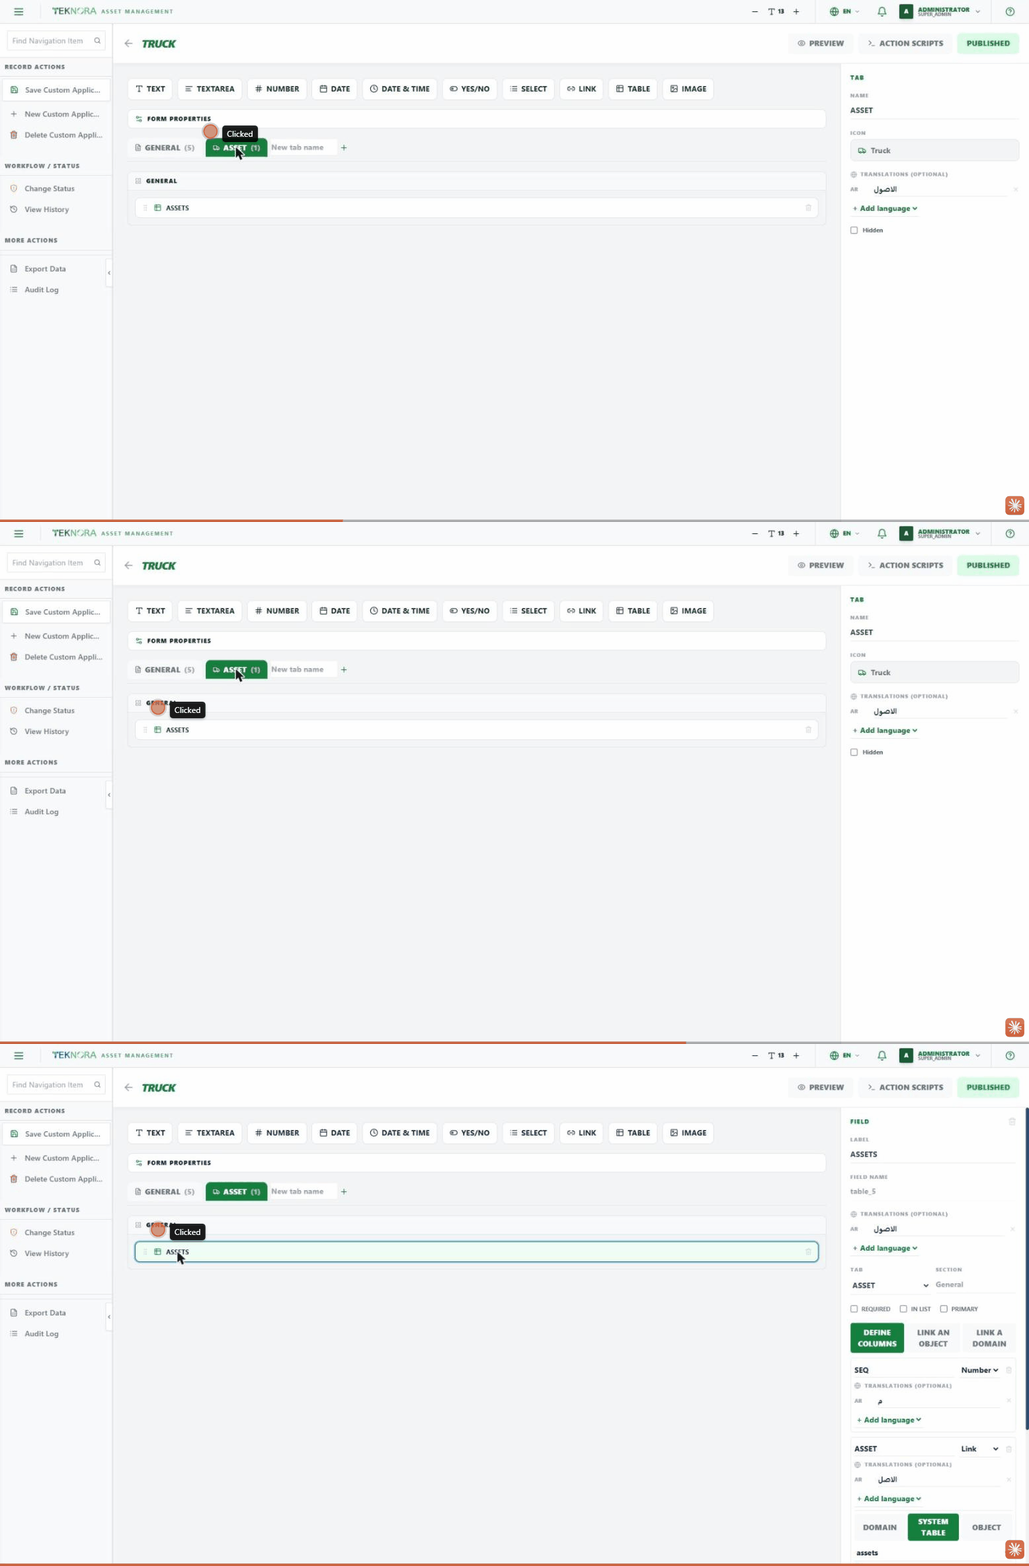
A field that lets you add multiple rows inside one record (like the spare parts table on the Assets screen). Three ways to define it:
- Define columns manually: add your own columns — each one can be text/number/date/yes-no/List, or even a link that points at a real record (like an "Asset" column that opens a search on the Assets table).
- Link to an object: the table automatically pulls its columns from another custom app's fields.
- Link to a domain: the table lets you add rows from a specific domain's values.
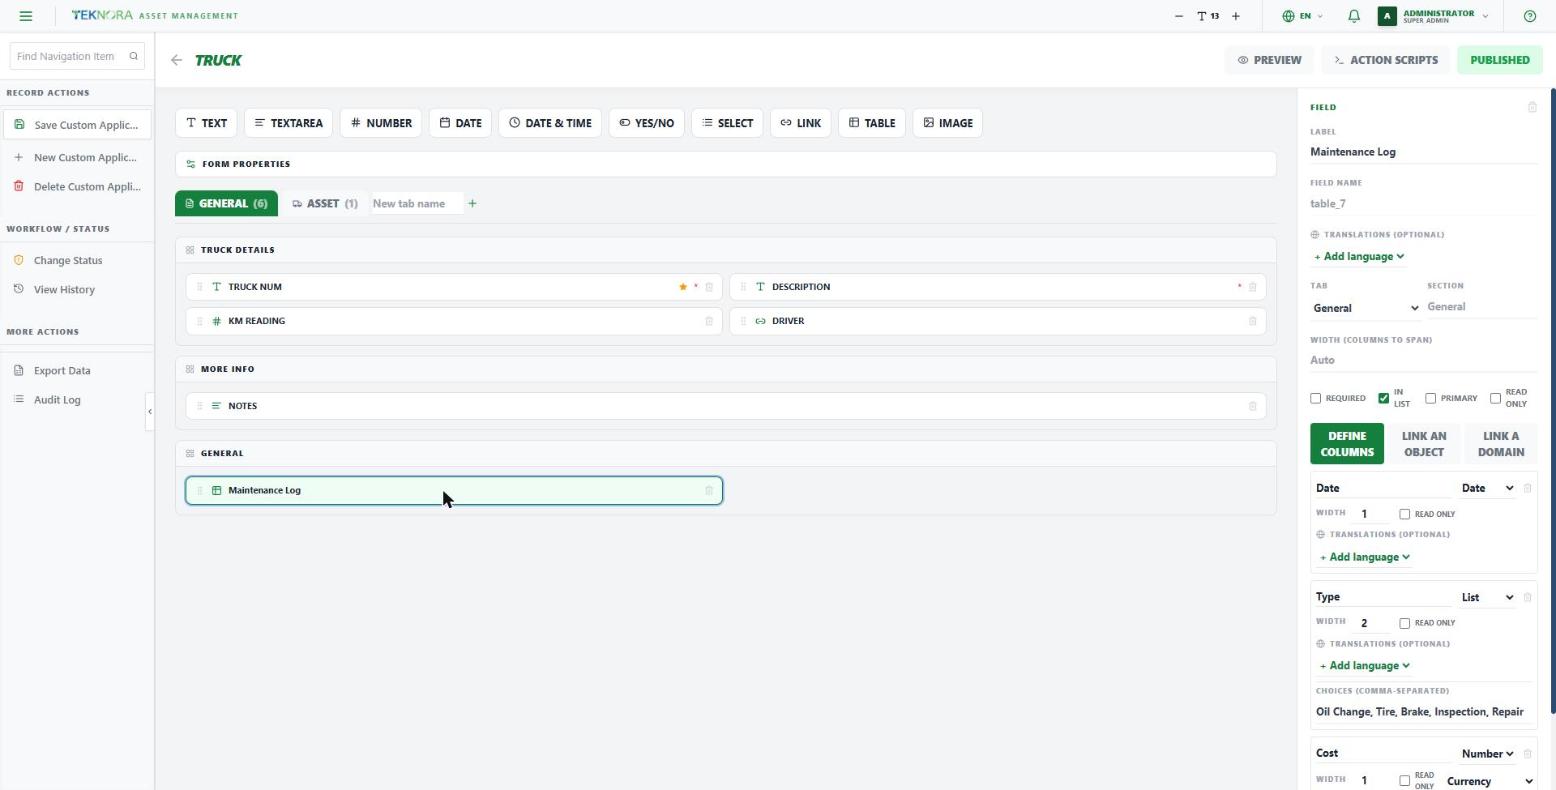
Each manually-defined column has extra properties:
- Width: a relative number (like ERPNext's column system) — a column with width 2 takes twice the space of a width-1 column, not a fixed pixel count.
- Read Only: same idea as the field-level property, but per column — useful for a column a script computes automatically (like a line-item total).
- List type: gives you a "Choices" box where you type comma-separated values — the column then renders as a dropdown with those values at runtime.
- Number Format: if the column is a number, choose Integer/Decimal/Currency just like any regular number field.
Practical Steps
1. Create a new custom app
From the "Custom Applications" list, click New App, fill in the name and category, then start adding fields from the top bar.
2. Organize the form
Drag fields to reorder them, group them into logical tabs and sections, and set each section's column count.
3. Translate
For any field/tab/section that more than one user in a different language needs to see, click "+ Add language" and add the needed translations — you don't have to translate into all 11 languages, only the ones you need.
4. Publish
When done, click Published at the top of the screen — the app won't appear in the sidebar or top menu for users until it's published.
5. Permissions
You must add read/create/update/delete permission for the new app from the Roles screen — every custom app gets an automatic permission key (custom_
Before publishing
Make sure all required fields and the primary field are set correctly before publishing — changing them after users have started entering data can cause confusion.
Back to: Custom Applications ←