Asset Details
The Asset Details screen is where you manage everything about an asset — from general information to spare parts, safety, meters, and its full maintenance and failure history.
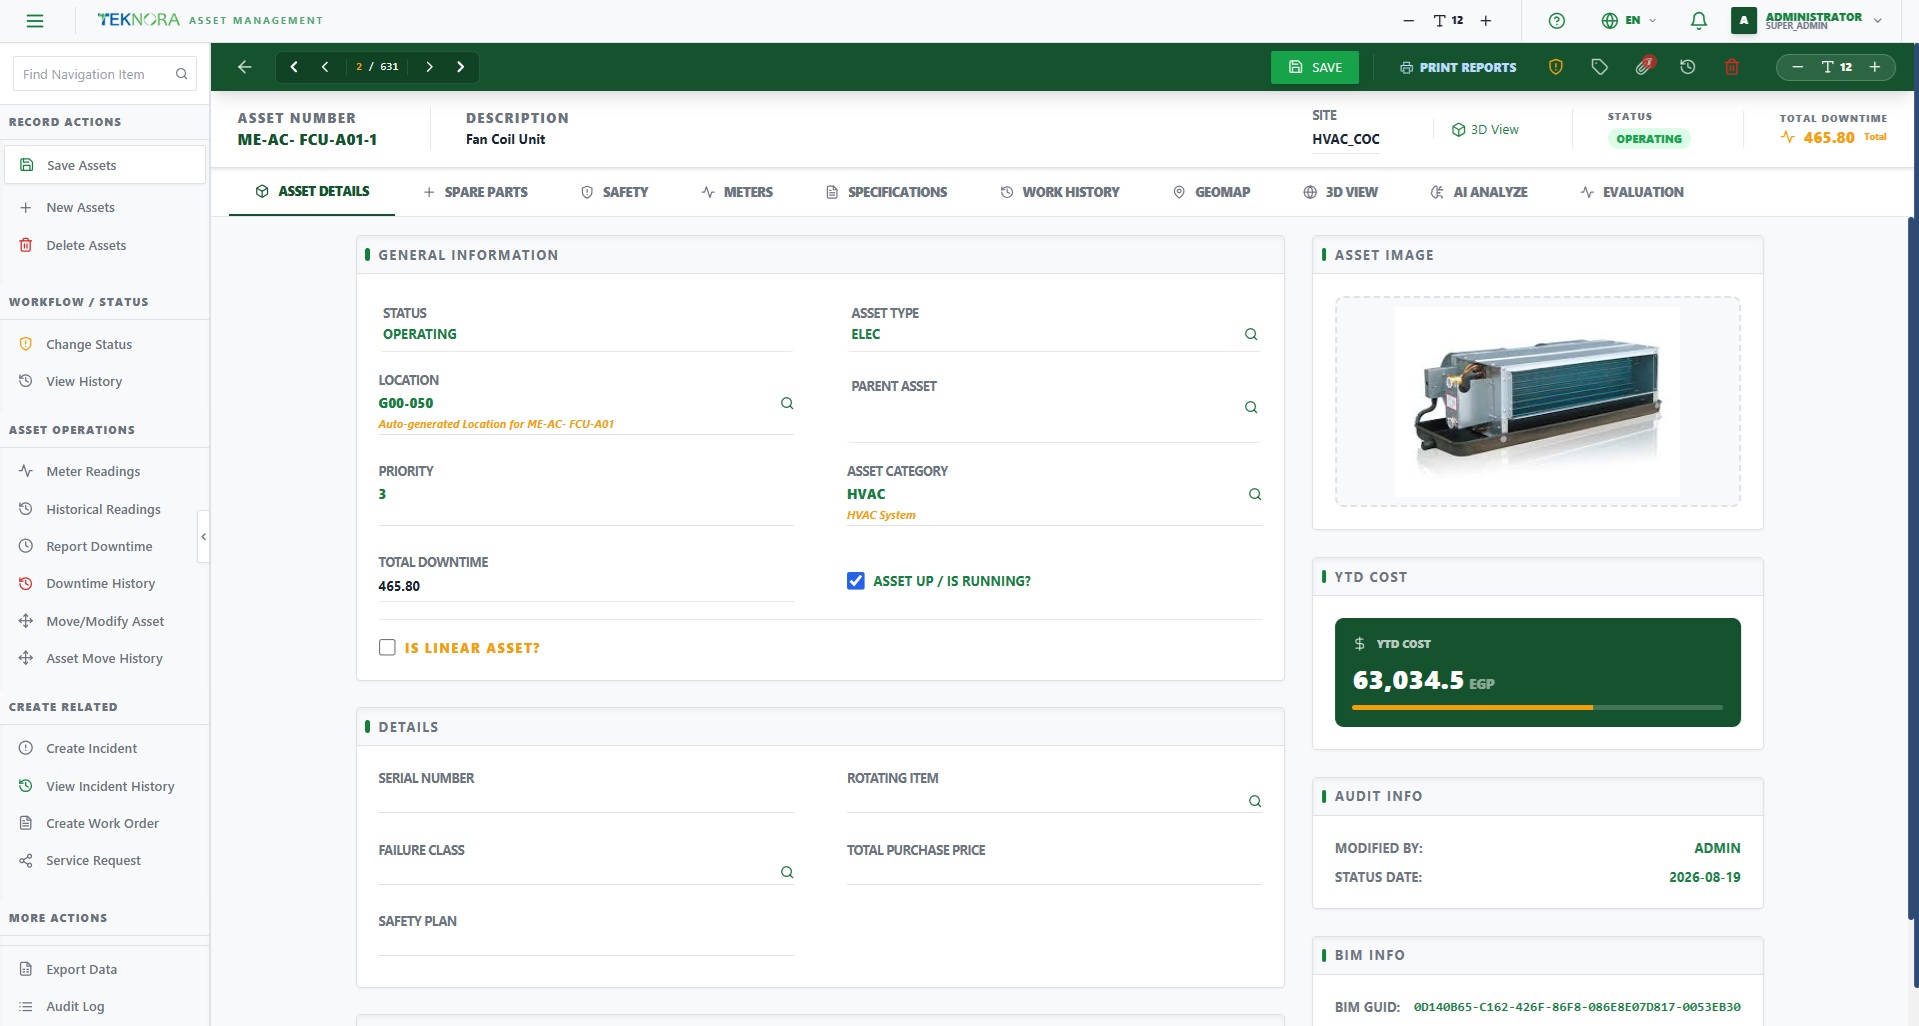
Top toolbar
| Button | Function |
|---|---|
| Back (arrow) | Returns you to the Asset Registry |
| Navigation (◀ ▶) | Moves to the previous/next asset within the same search result |
| Save | Saves all changes across every tab at once |
| Delete | Deletes the asset (if it's linked to movements or work orders, the system blocks the delete and suggests Decommissioning instead) |
| Attachments (📎) | Files and images attached to the asset |
| Audit Log | Shows the full change history of this record — who changed what, and when |
| Prints/exports an asset report | |
| Status | Changes the asset's status (OPERATING, DOWN, DECOMMISSIONED...) |
Key fields
- Asset Num: The asset's unique identifier — required.
- Description: The asset's name/description.
- Location: The physical location linked to the asset.
- Status: The current operational status.
- Priority: The asset's maintenance priority.
- Is the asset running?: A quick checkbox indicator of whether the asset is currently running.
- Is the asset linear?: For linear assets (pipelines, roads) with start/end measures.
Tabs
Each tab below opens an independent part of the asset's data, and any edit inside it is saved along with the rest of the screen when you click Save at the top.
1. Asset Info
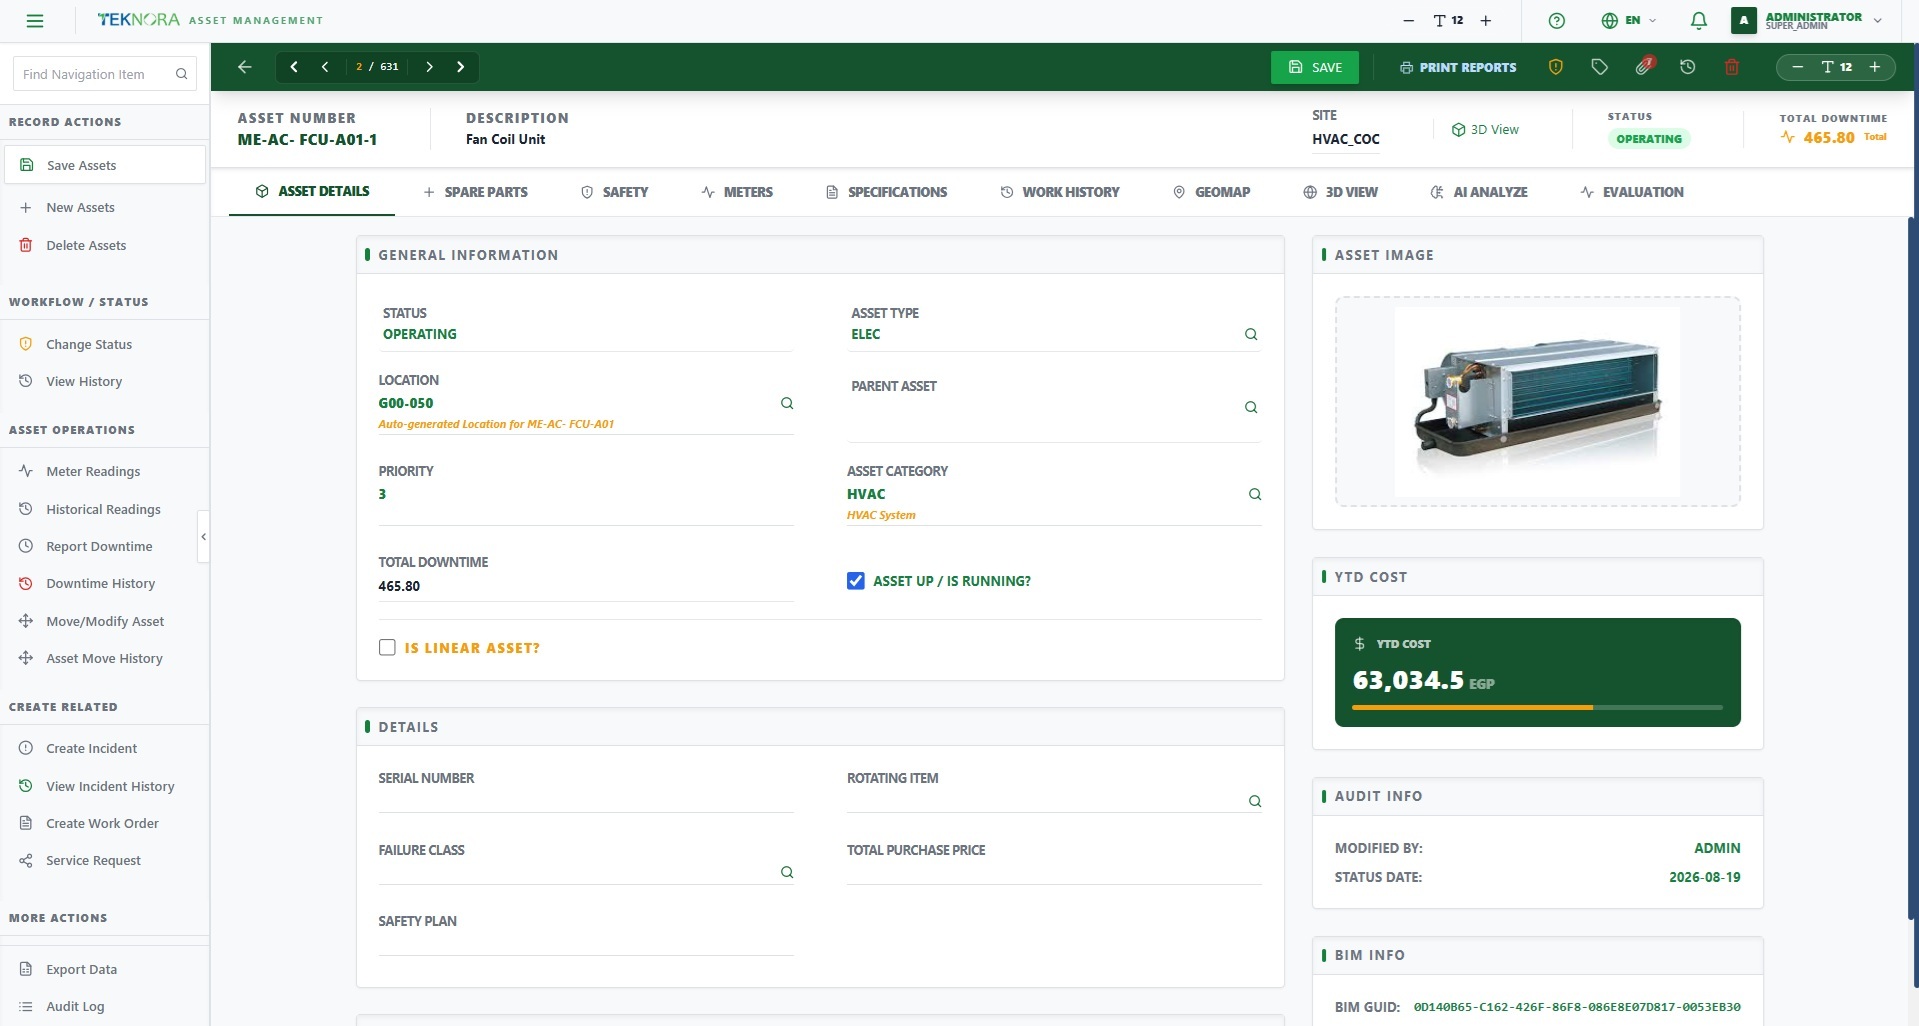
The main, default tab. Contains general information (description, location, status, priority), extra details such as serial number and failure class, and the parent/child hierarchy — very useful in composite systems like a production line made up of several machines.
2. Spare Parts
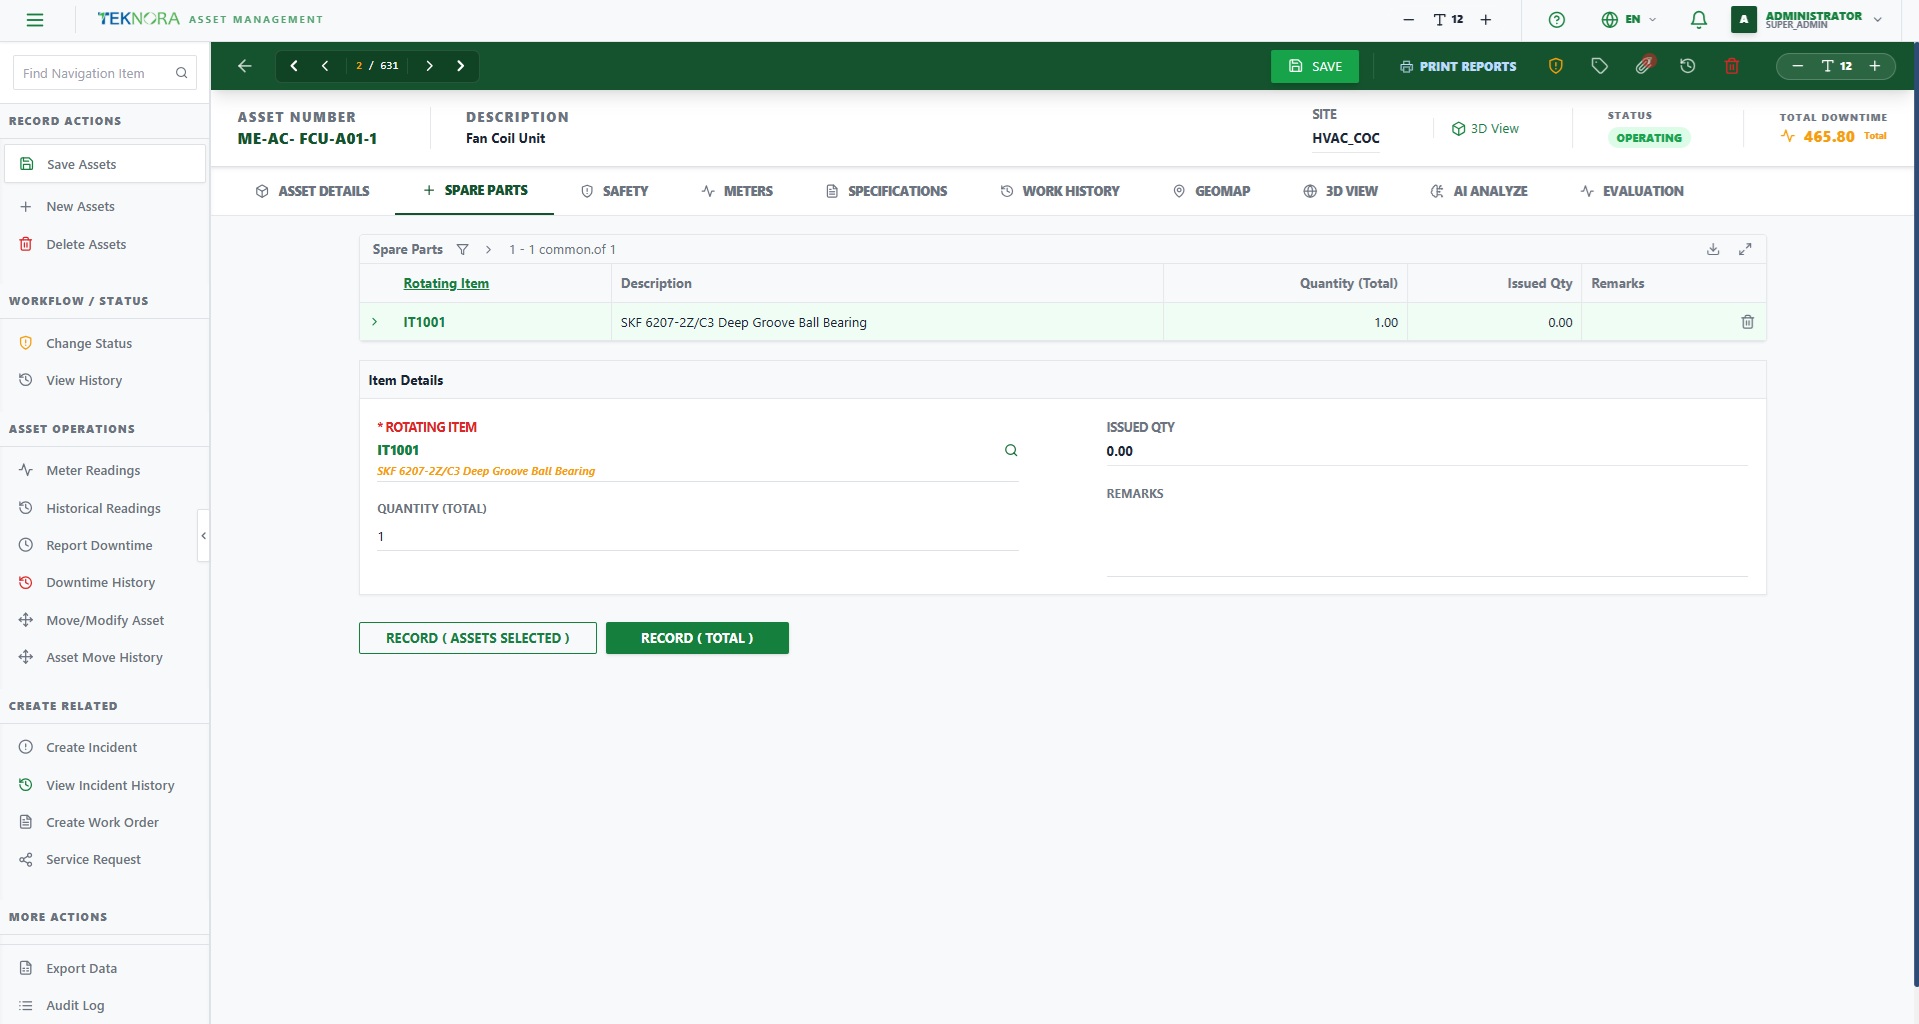
A list of the spare parts approved for this asset — anything replaced periodically (filters, belts, bearings...). This table helps the storeroom team prepare the needed parts before a maintenance technician goes out, and when you create a work order on the asset, these parts appear as ready-made suggestions.
3. Safety
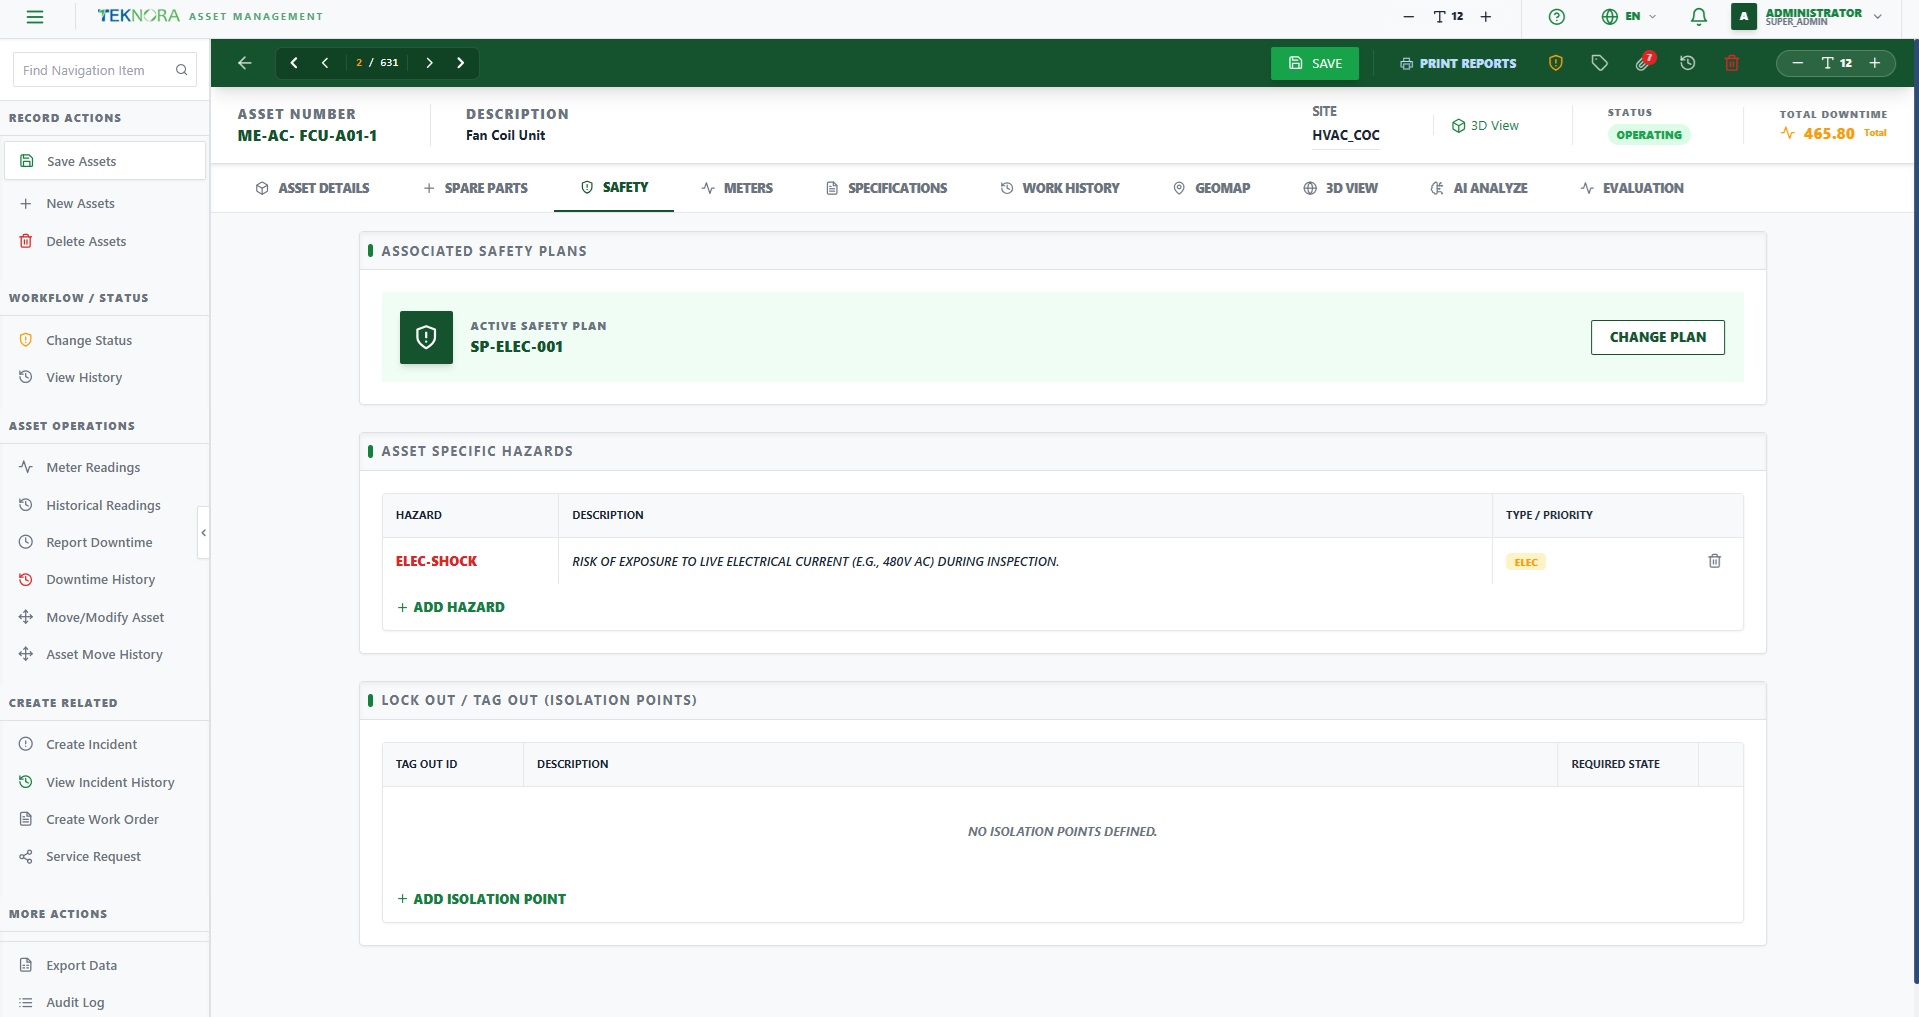
Hazards registered on the asset (electrical, pressure, heat...) and any linked lockout/tagout plans. A maintenance technician must review this tab before starting work on the asset — these hazards appear automatically on the linked work order.
4. Meters
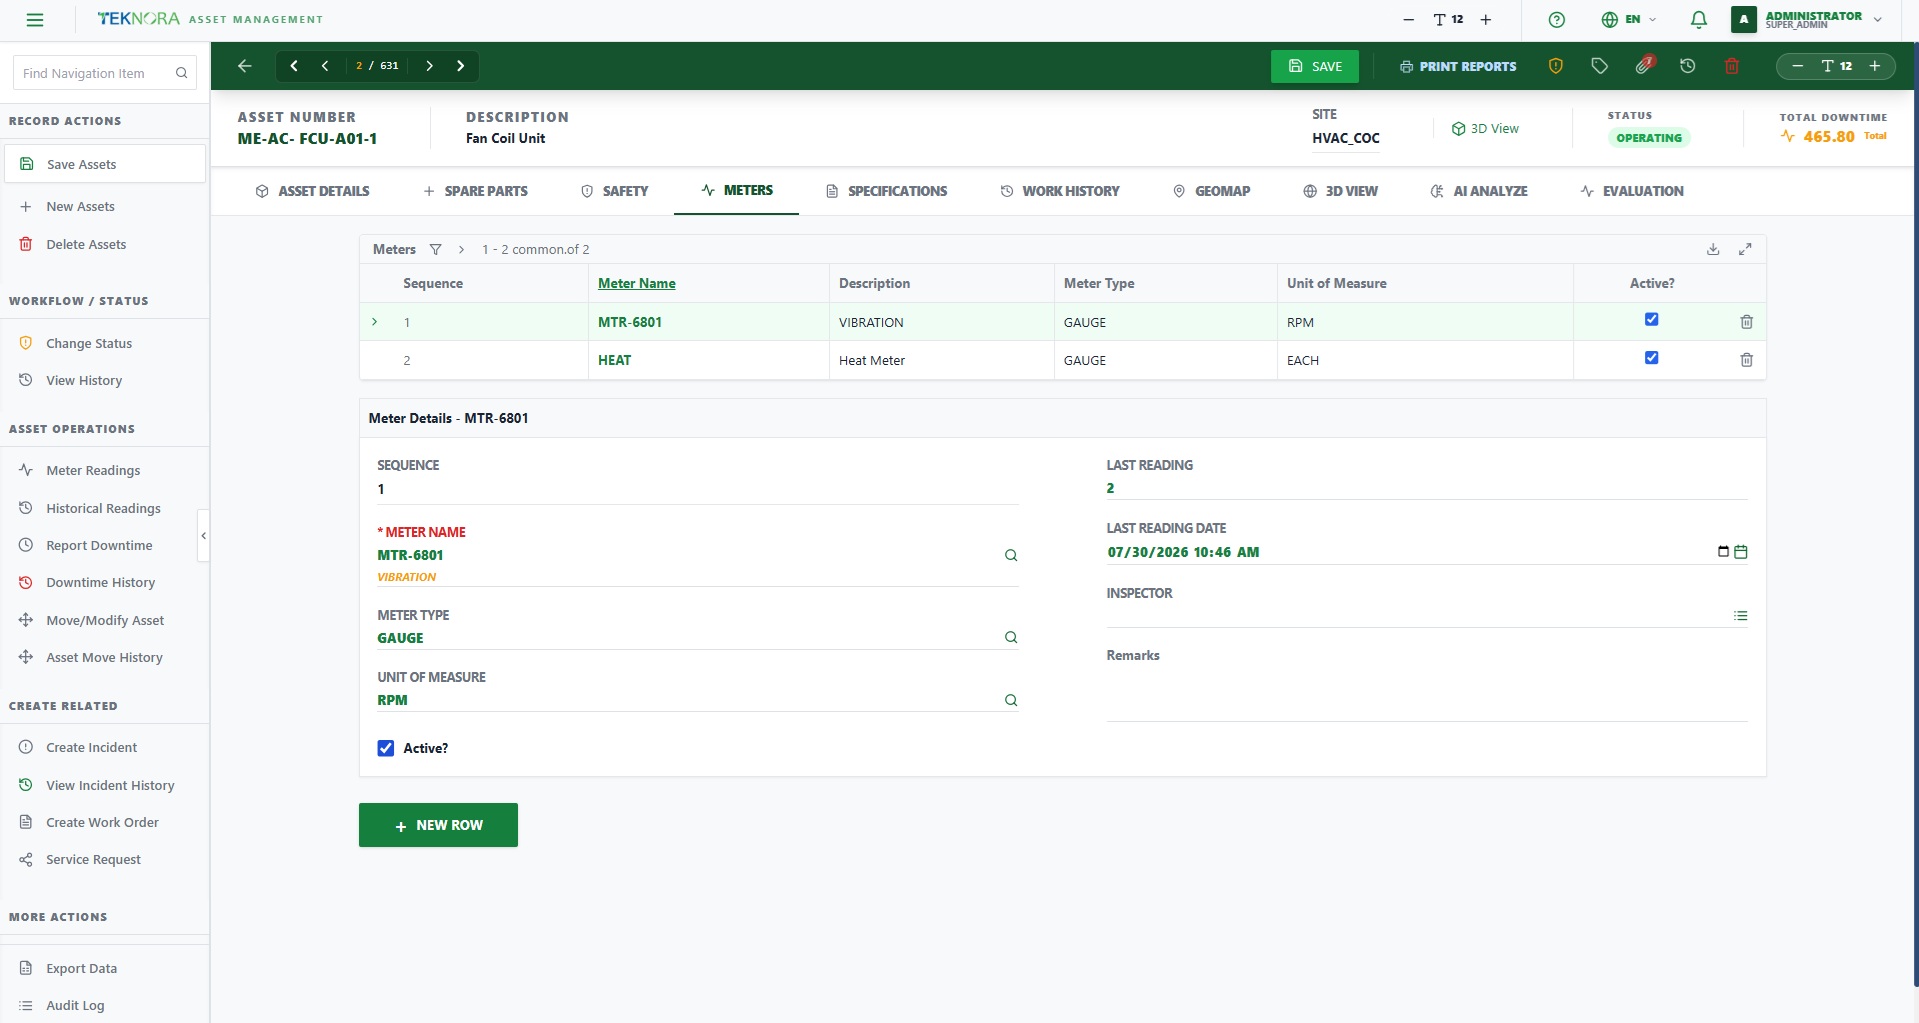
All meters registered on the asset (running hours, power consumption, cycles...) with their last reading and its date. These meters are what drive usage-based preventive maintenance (Meter-Based PM), rather than relying on date alone.
5. Specifications
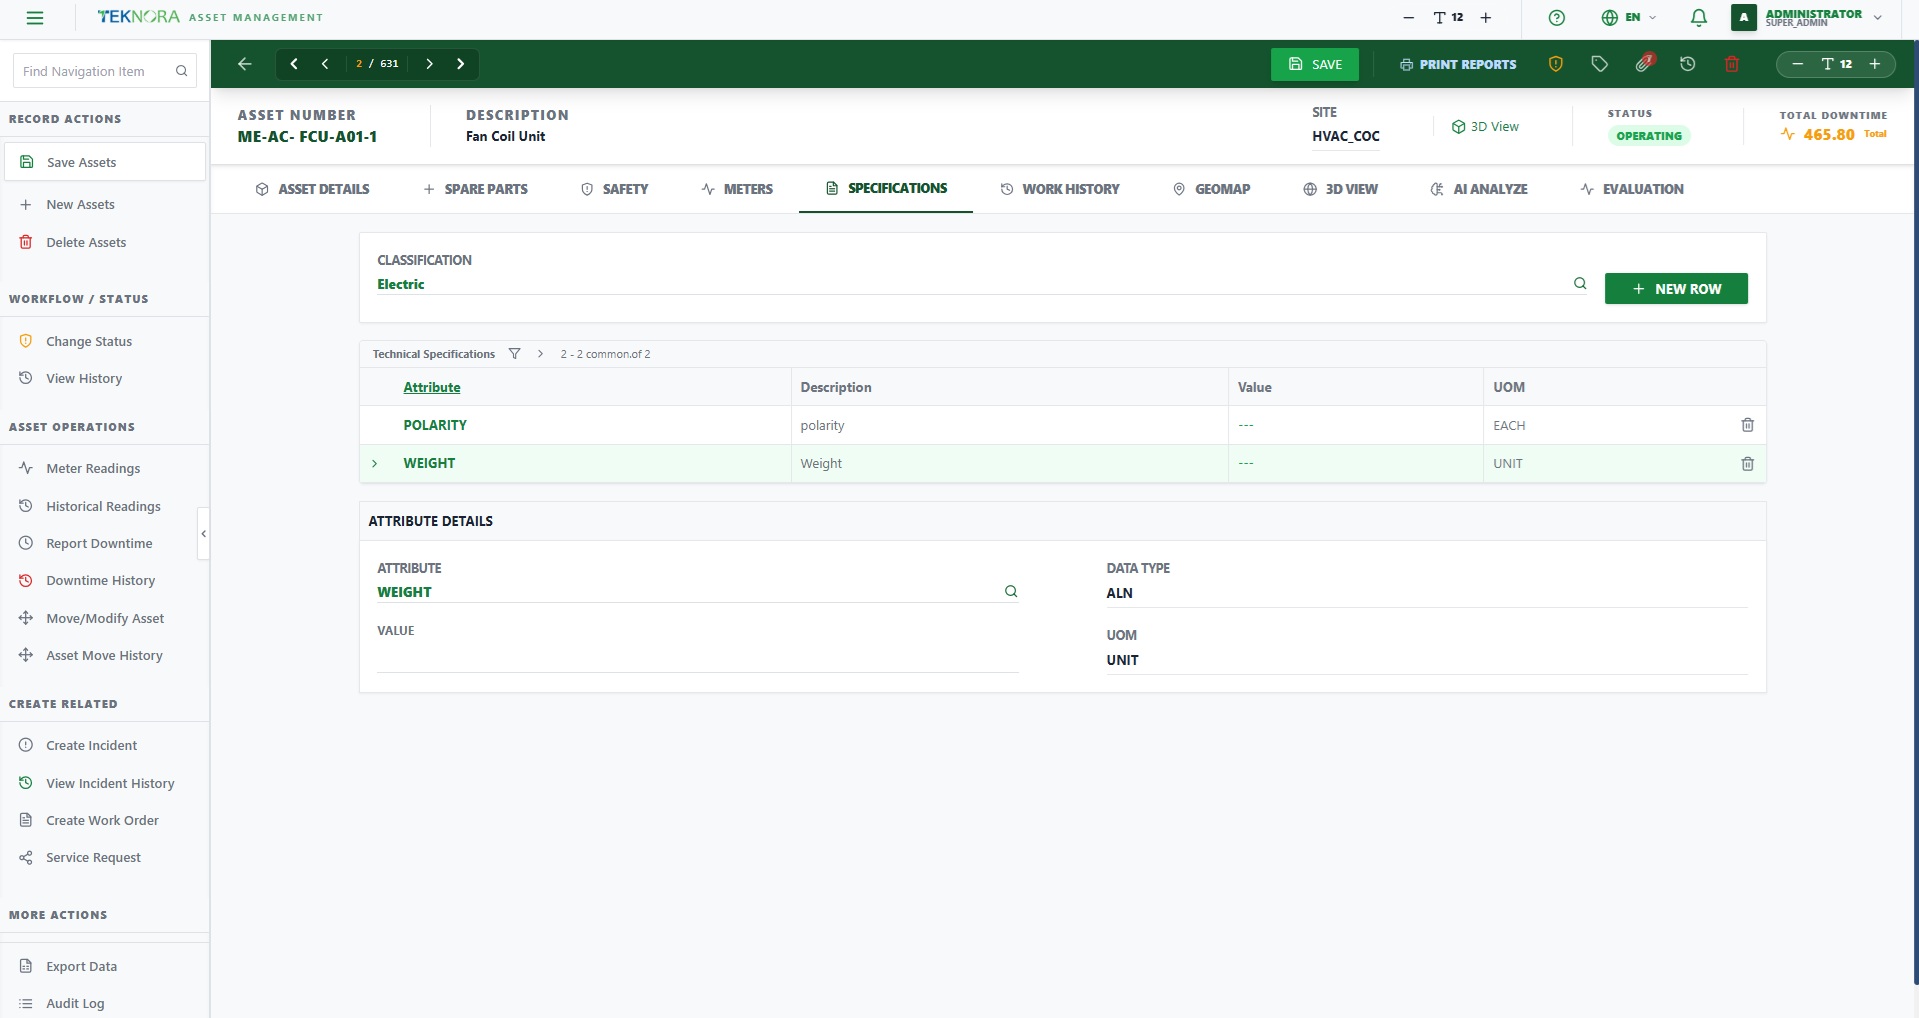
The asset's technical specifications — manufacturer, model, capacity, dimensions, and any other technical attribute depending on the asset type. Useful during purchasing or when searching for assets with a specific specification.
6. Work History
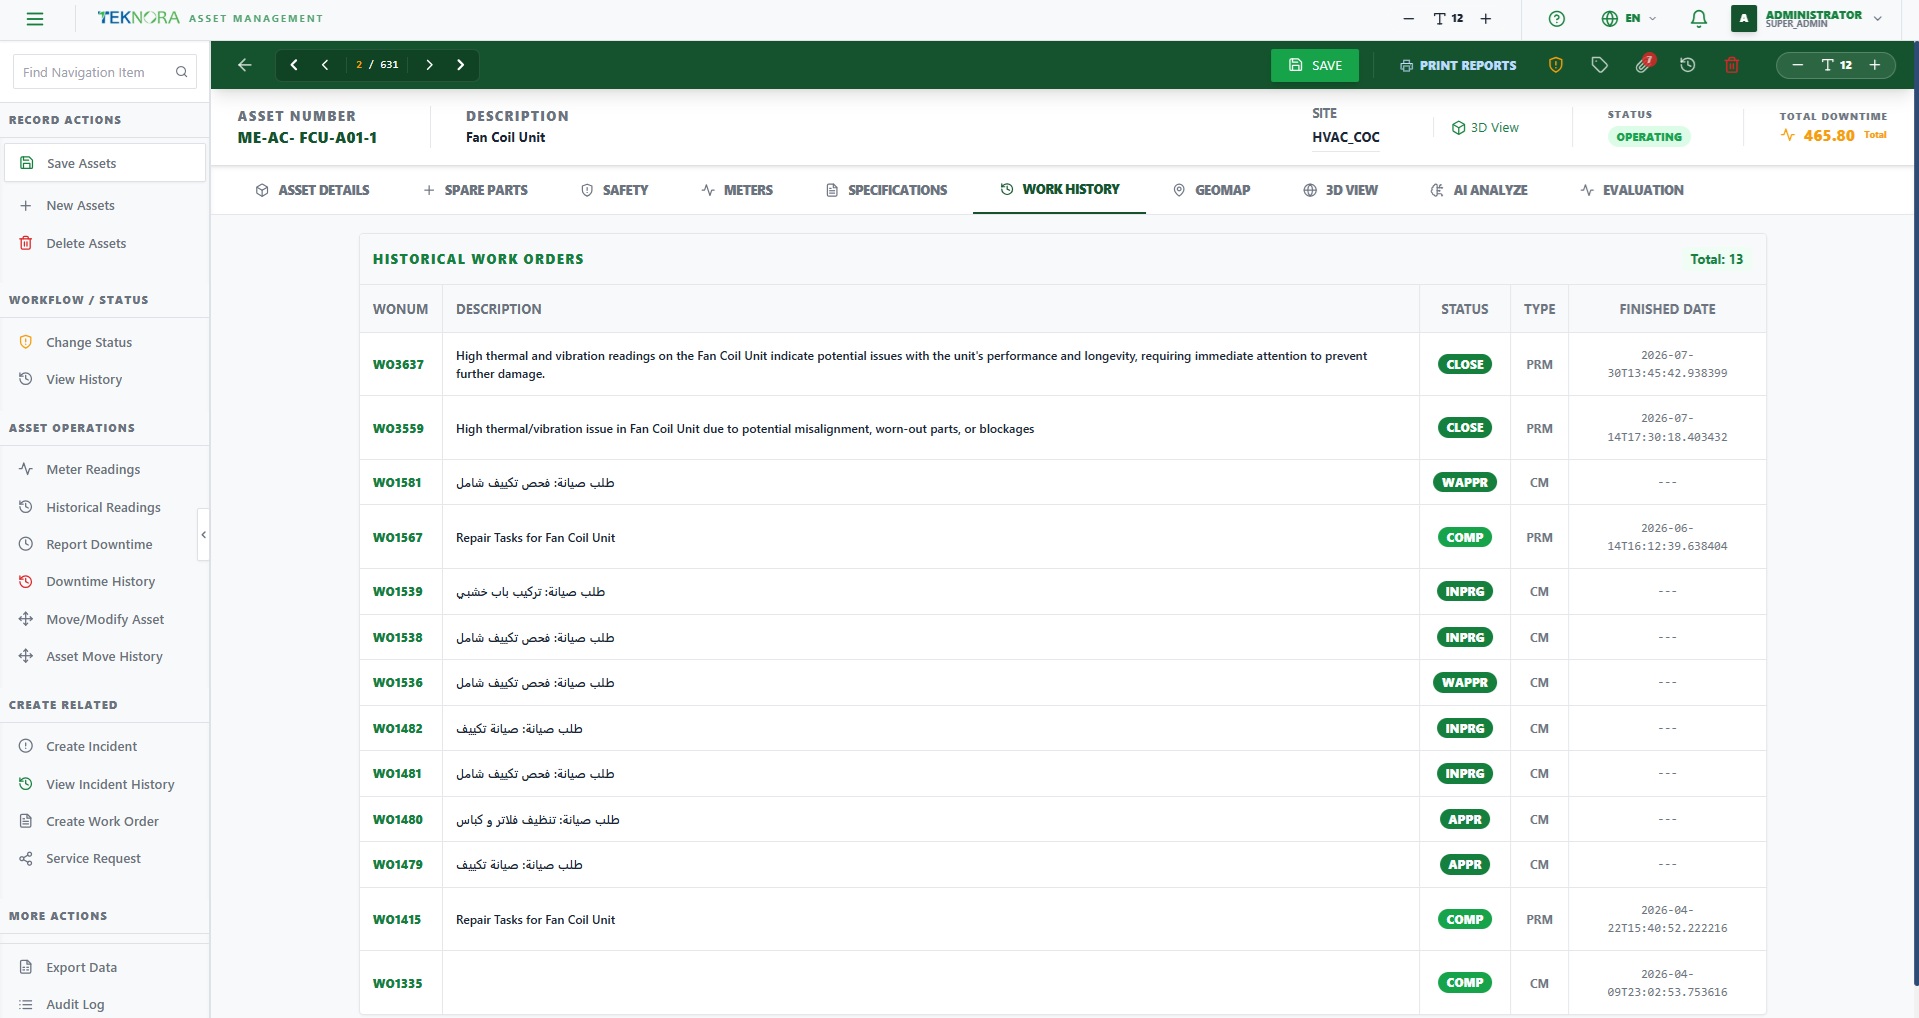
Every work order performed on the asset since it was created — preventive maintenance, breakdown repairs, inspections. This is the most important source for understanding the asset's behavior over time (does it break down often? what's the most recurring failure?).
7. Map
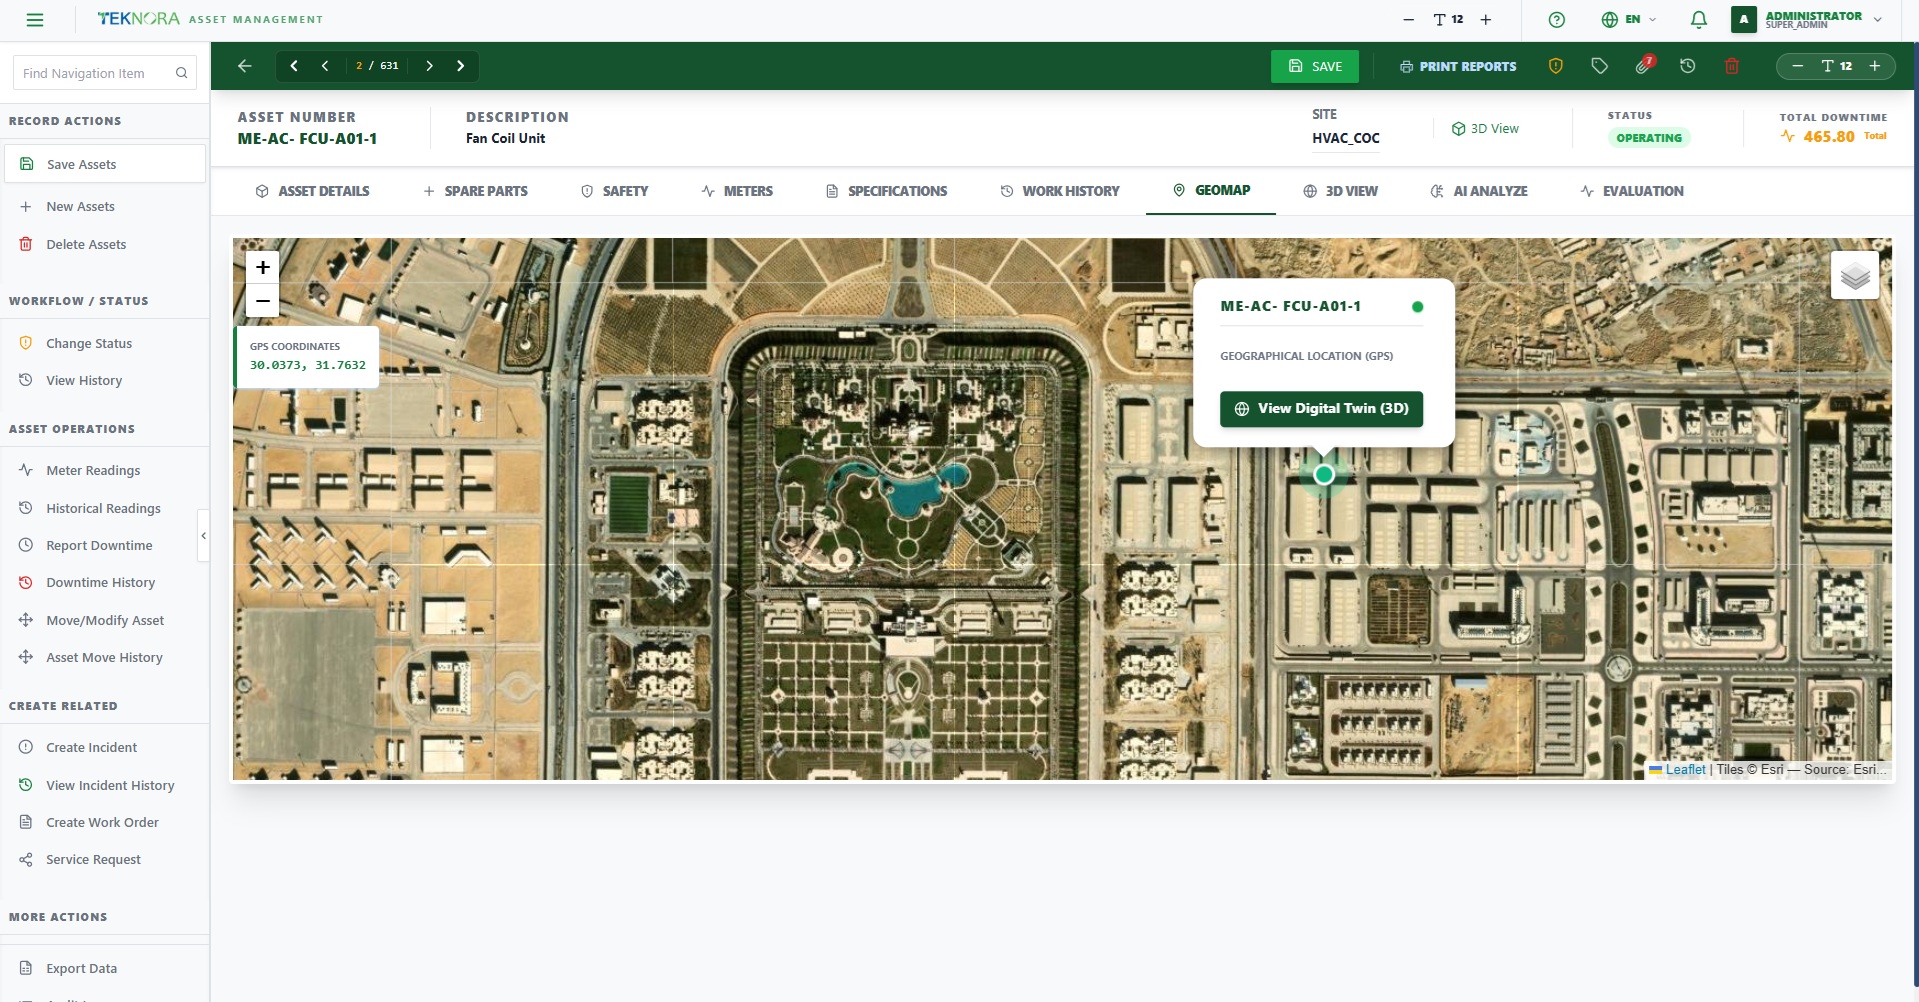
The asset's location on a real geographic map (if the linked location has coordinates). Useful for geographically distributed assets like scattered stations or field sites.
8. 3D Model
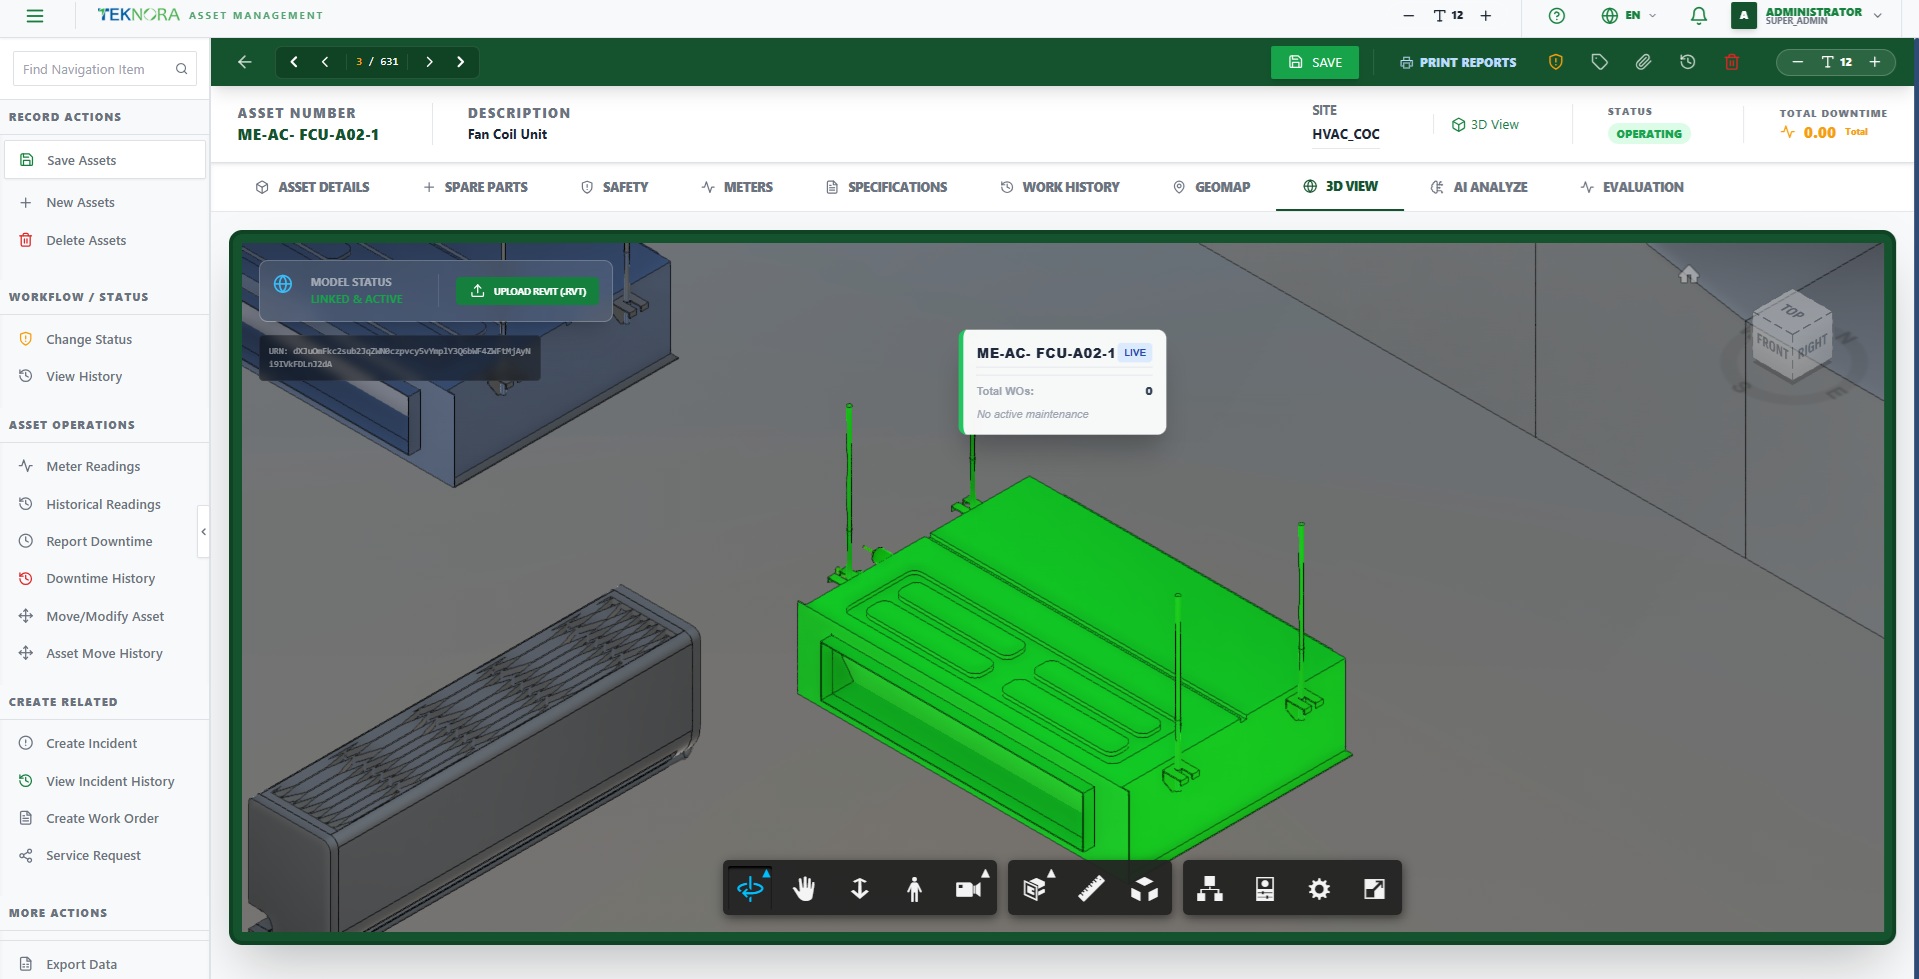
View the asset inside a BIM/Digital Twin 3D model (if the location is linked to a BIM file). You can rotate around the asset and see exactly where it sits inside the building or facility.
9. AI Analysis
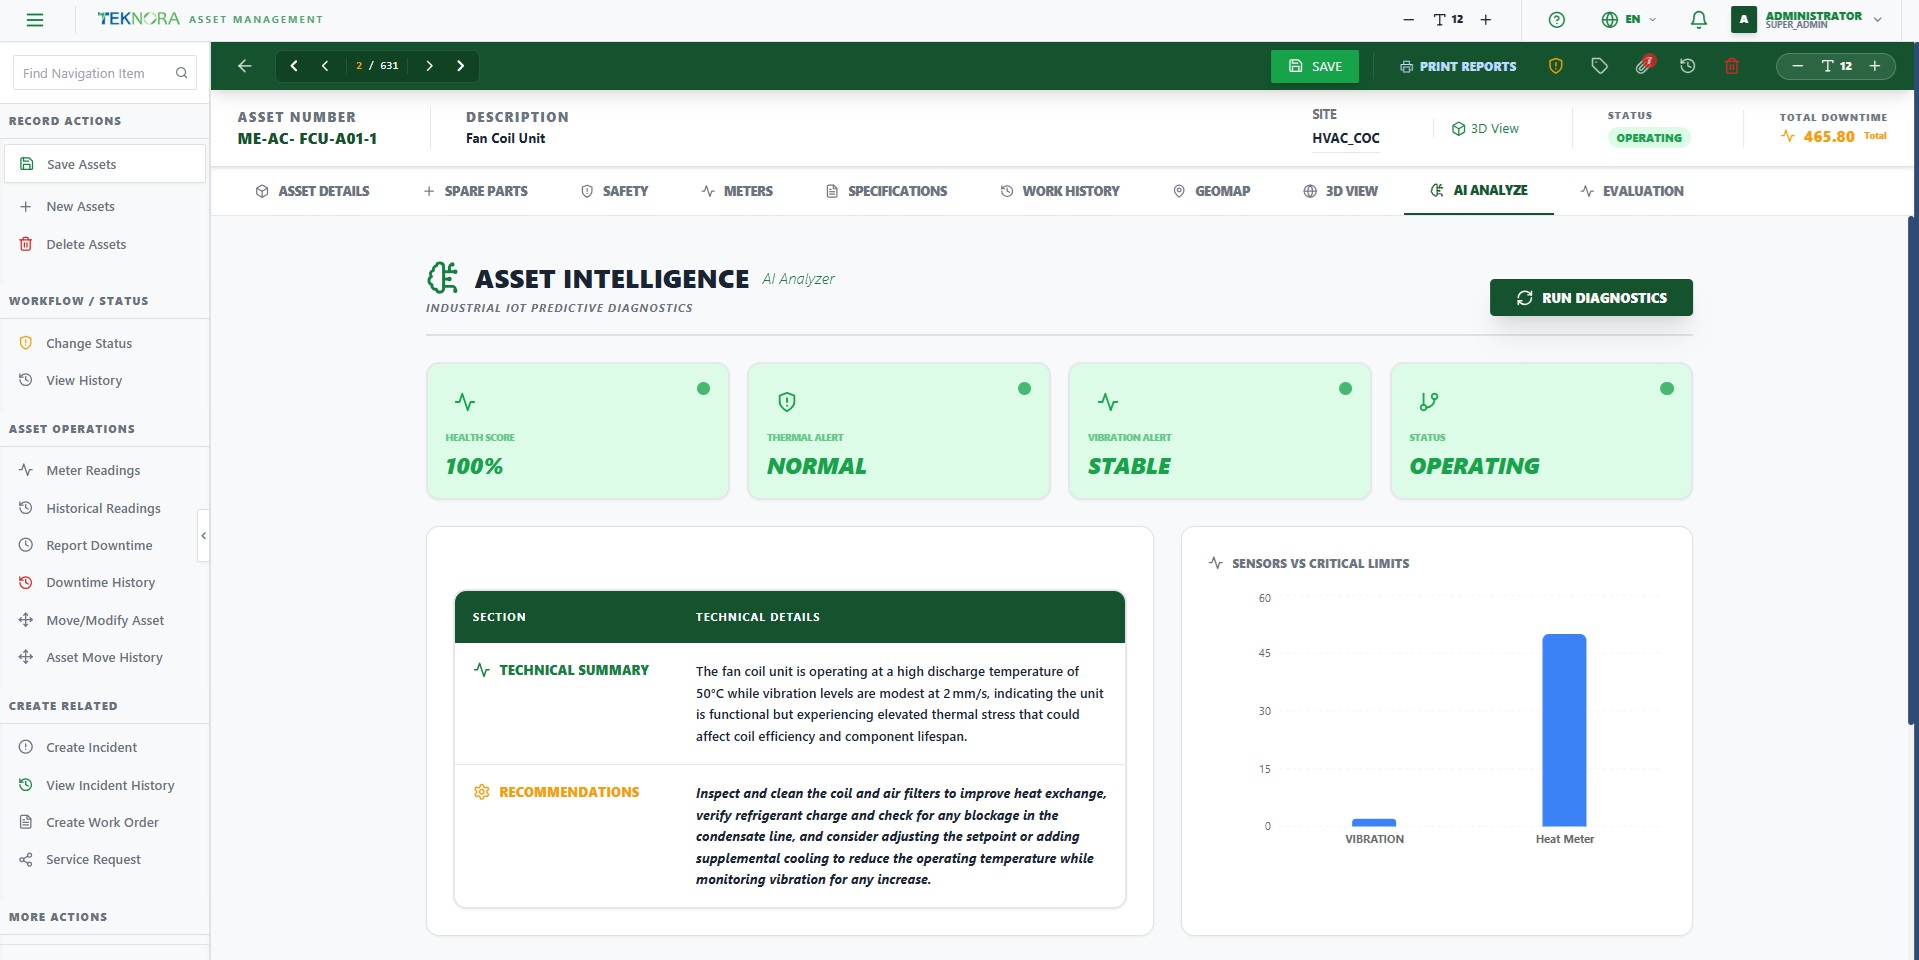
Automated analysis based on the asset's data and history — it summarizes patterns (like a specific failure recurring in a given period) and suggests preventive actions. This analysis updates every time new data (work orders, meter readings) is added to the asset.
10. Performance
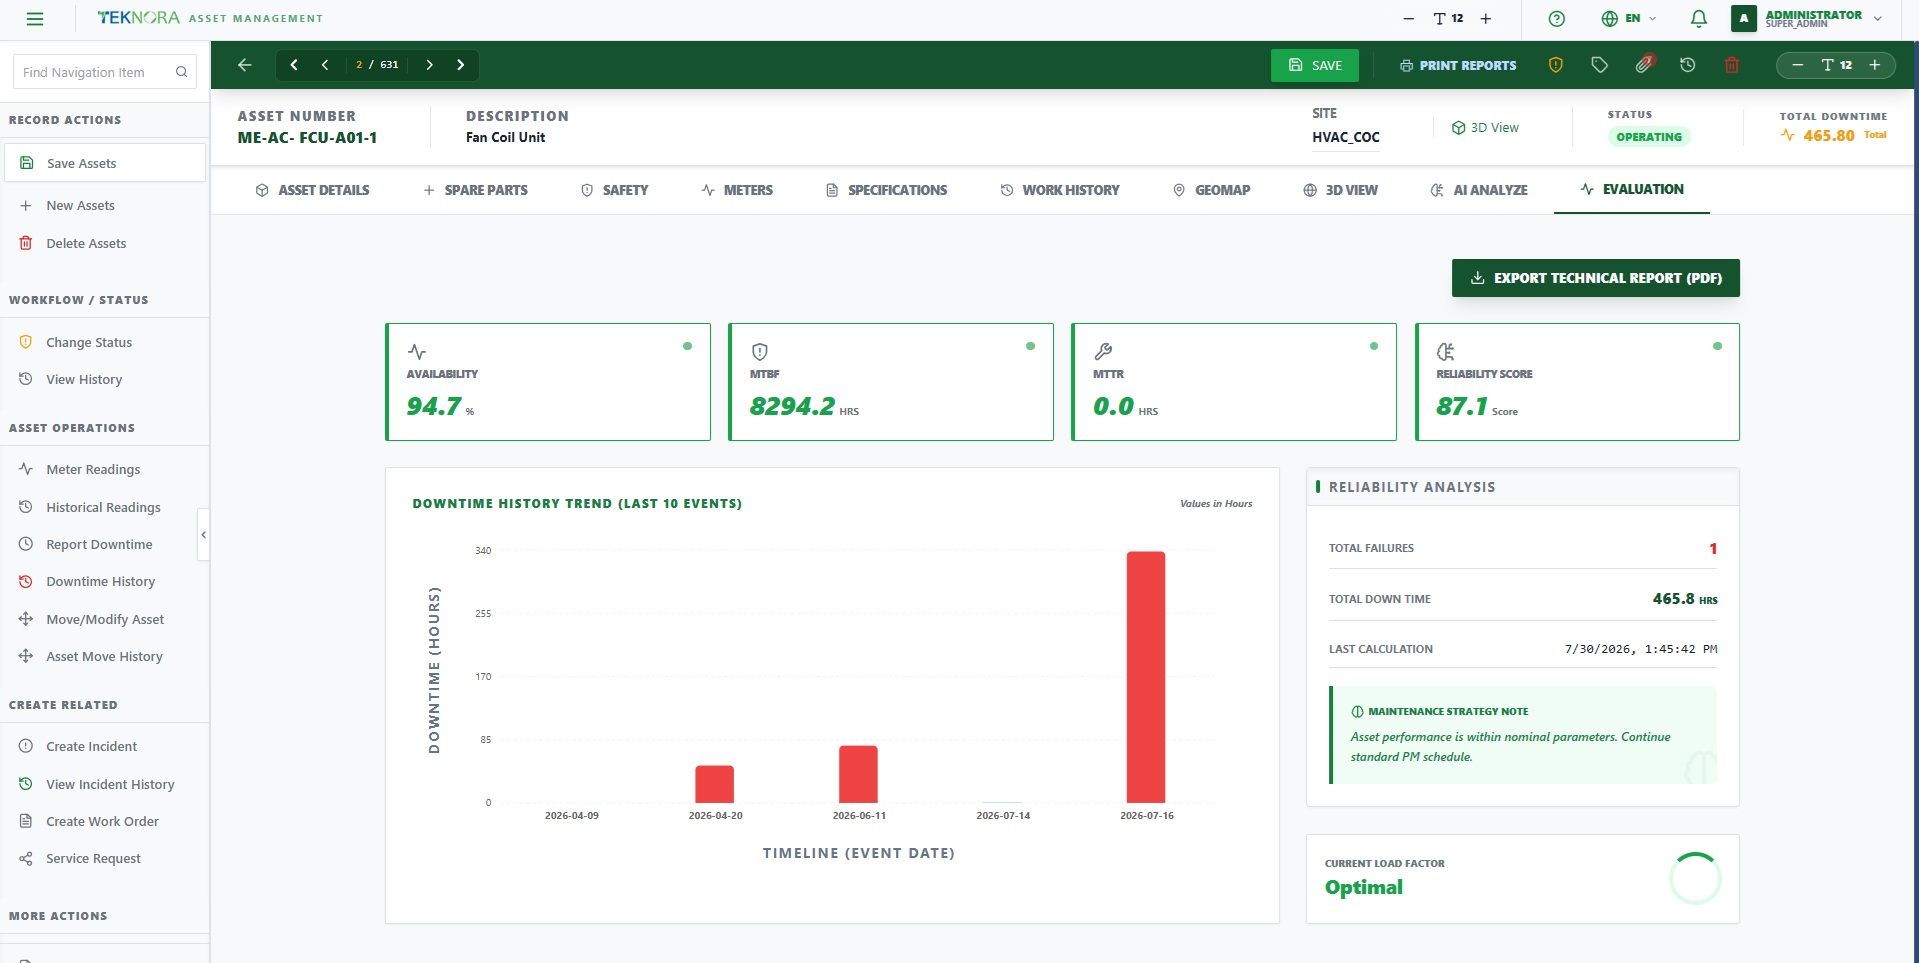
The asset's key performance indicators: total downtime, Mean Time Between Failures (MTBF), and Mean Time To Repair (MTTR). Management uses these indicators to evaluate the asset's efficiency and compare it against similar assets.
Sidebar Actions
Alongside the tabs, the sidebar (More Actions) has a list of actions that open dedicated windows or sub-screens for common operations on the asset, instead of digging through the tabs.
Asset Operations
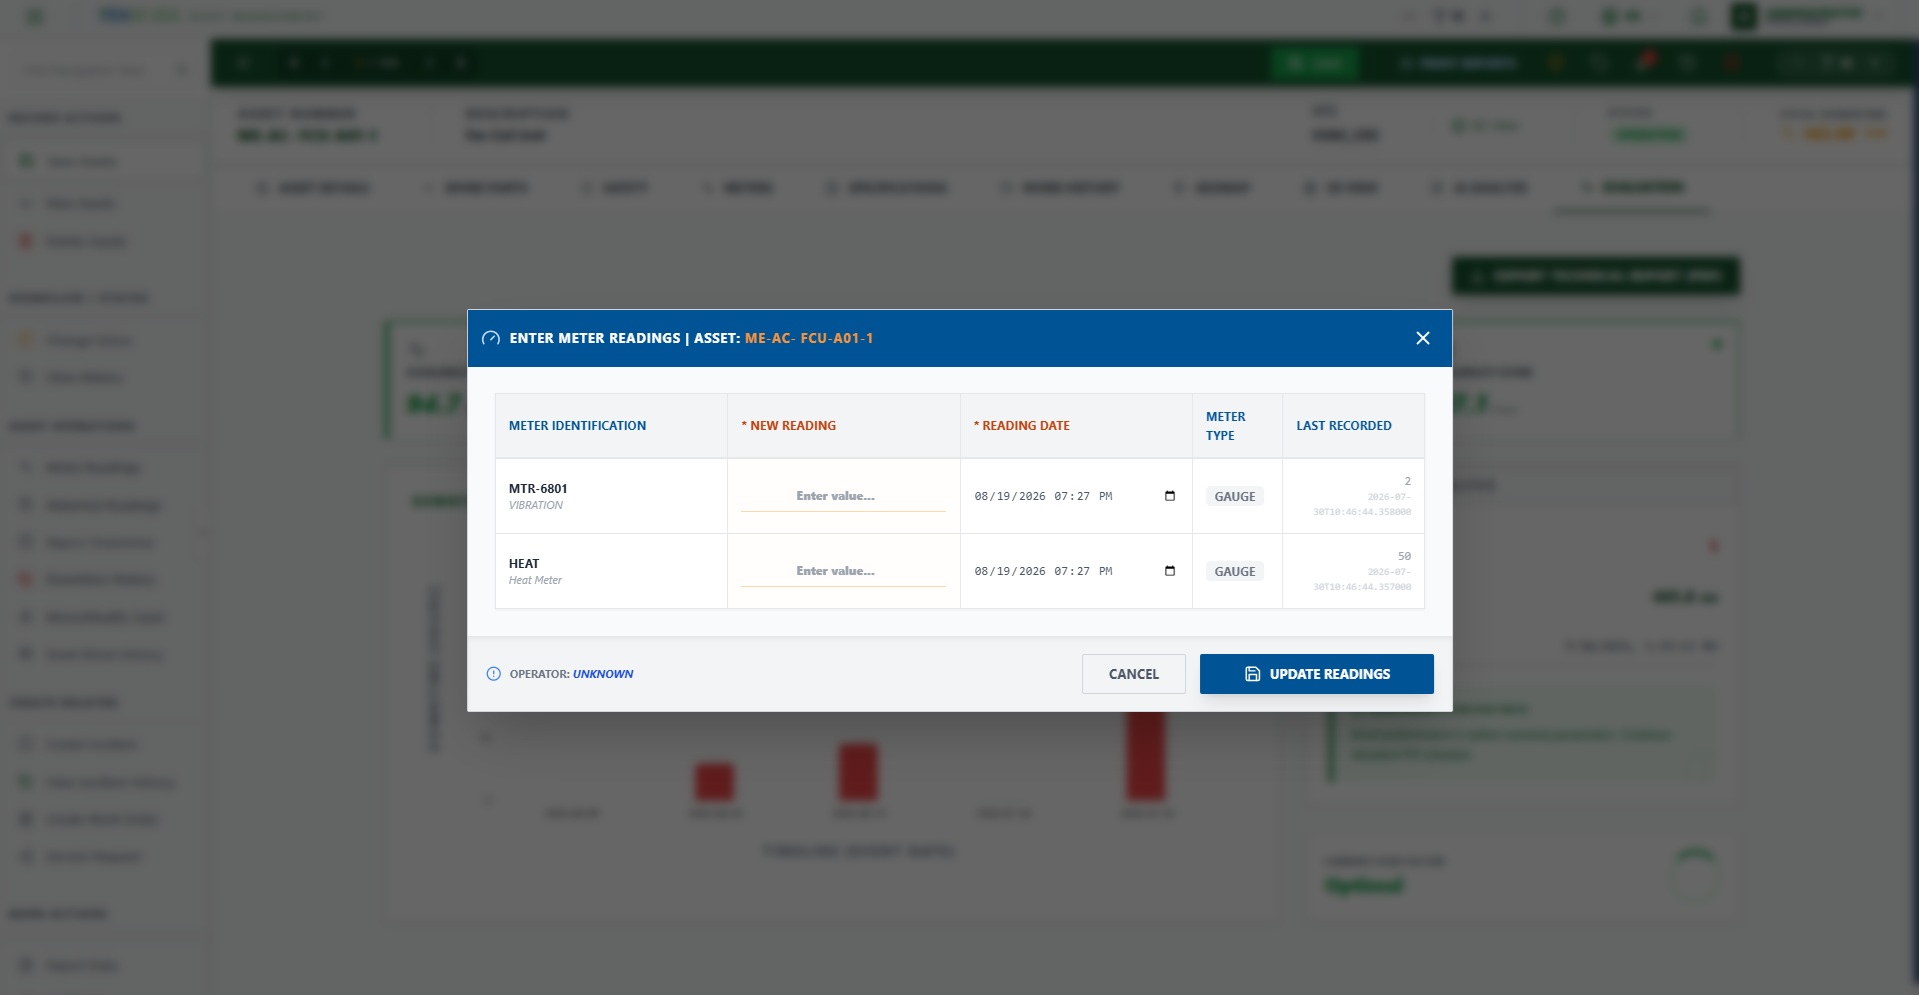
Meter Readings: A quick window to record a new reading for any of the asset's meters, without opening the Meters tab and editing manually.
Reading History: Shows every previous reading for the asset's meters, ordered by date — useful for tracking consumption or wear trends over time.
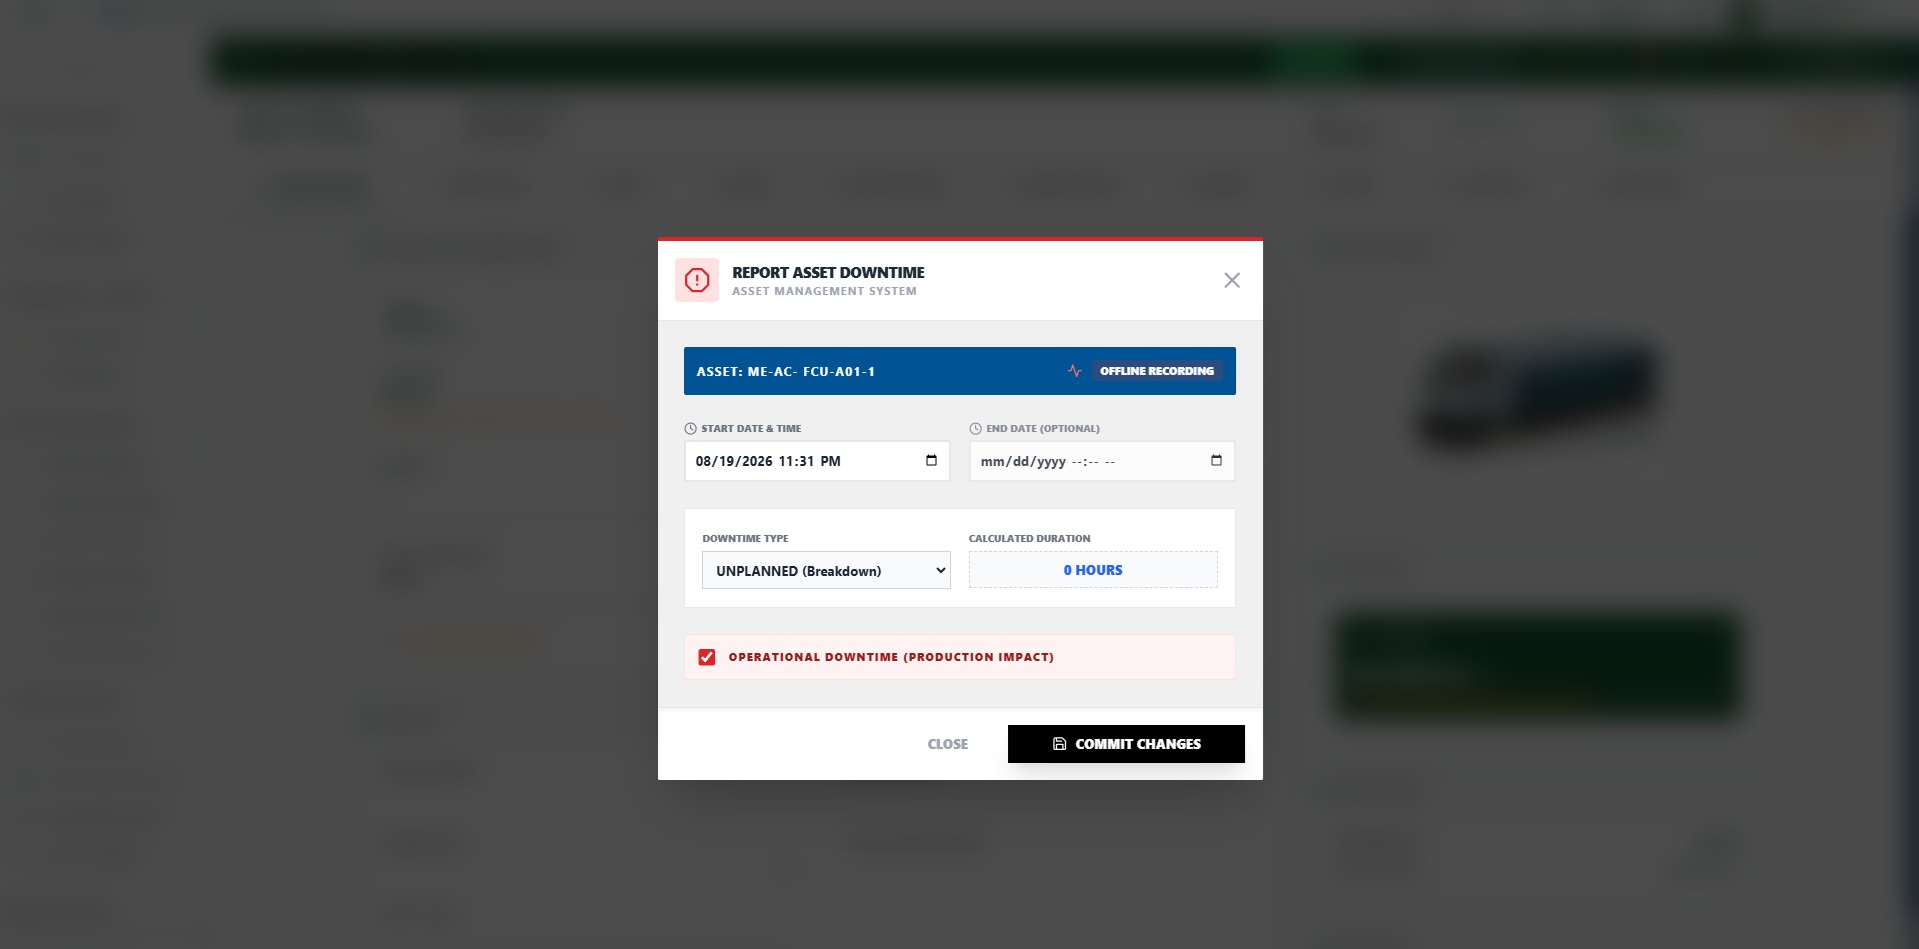
Report Downtime: Records a new downtime period for the asset (start, end, and reason) — this data feeds into the "Total Downtime" shown at the top of the screen and in the Performance tab.
Downtime History: A list of every downtime period recorded on the asset historically.
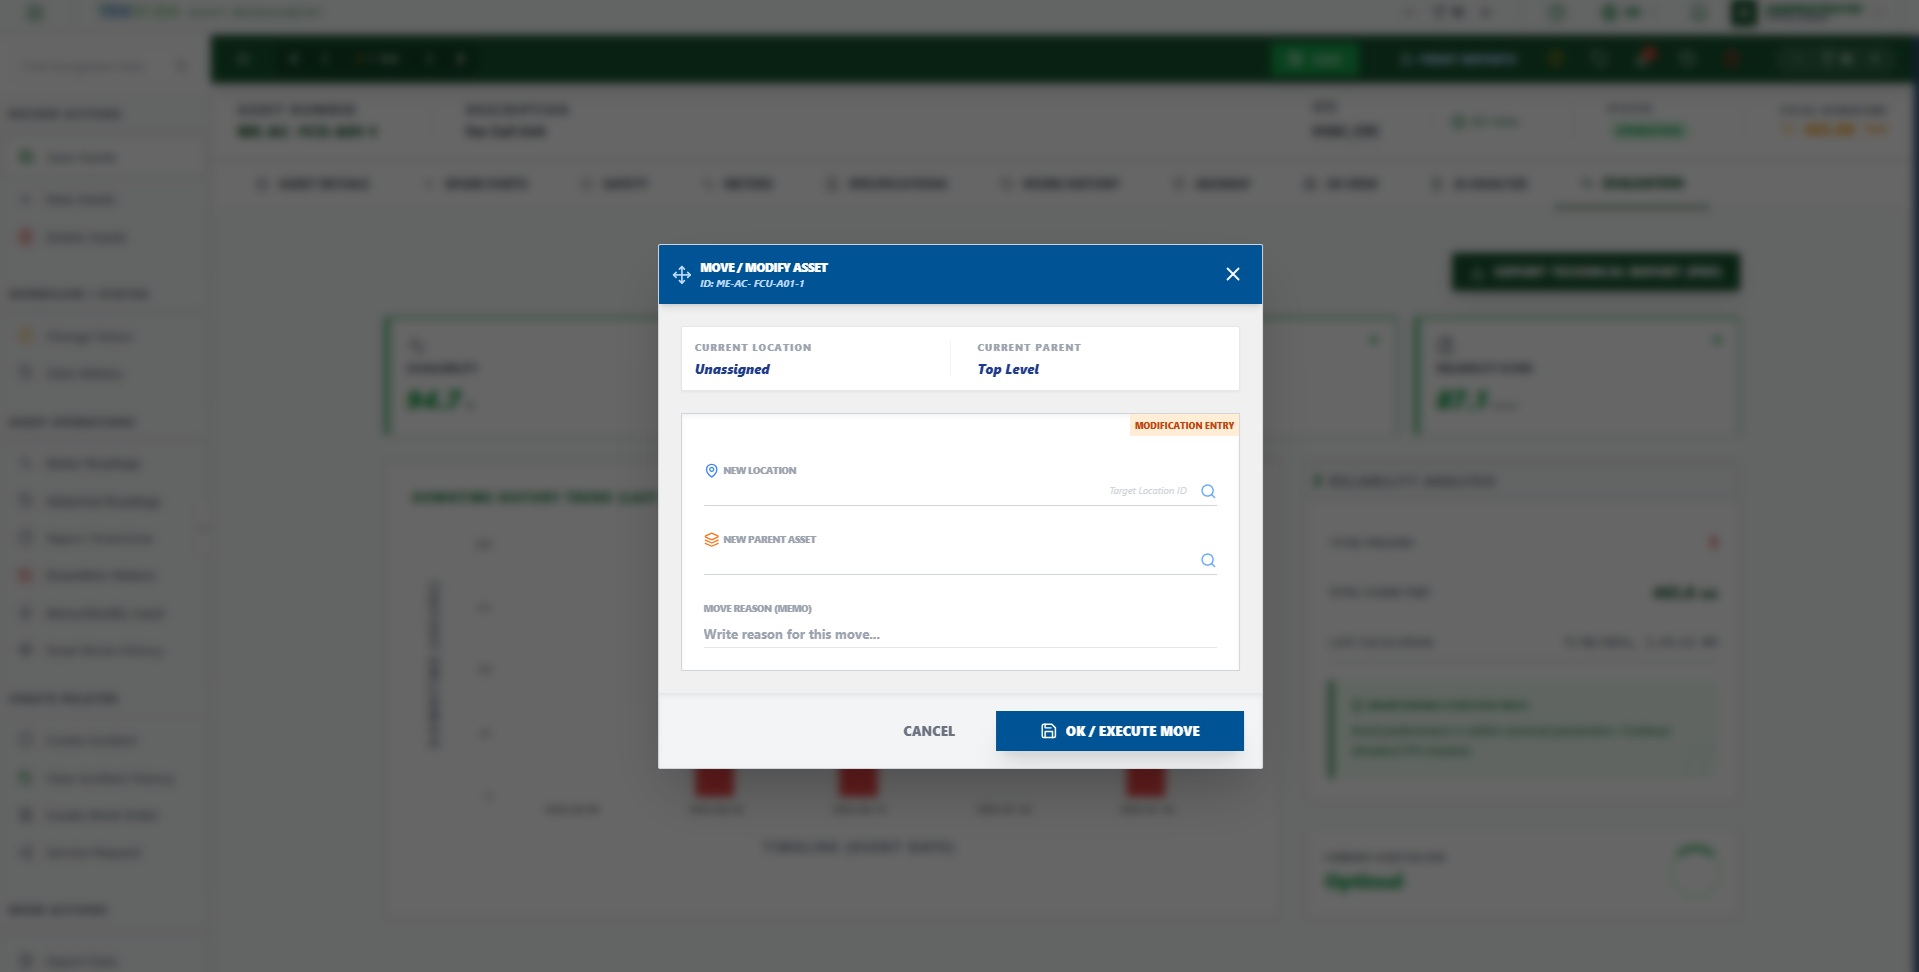
Move/Modify Asset: Quickly move the asset to a new location or edit its basic data, while keeping a movement record.
Asset Move History: The history of every previous move for this asset — from where, to where, and when.
Create Related
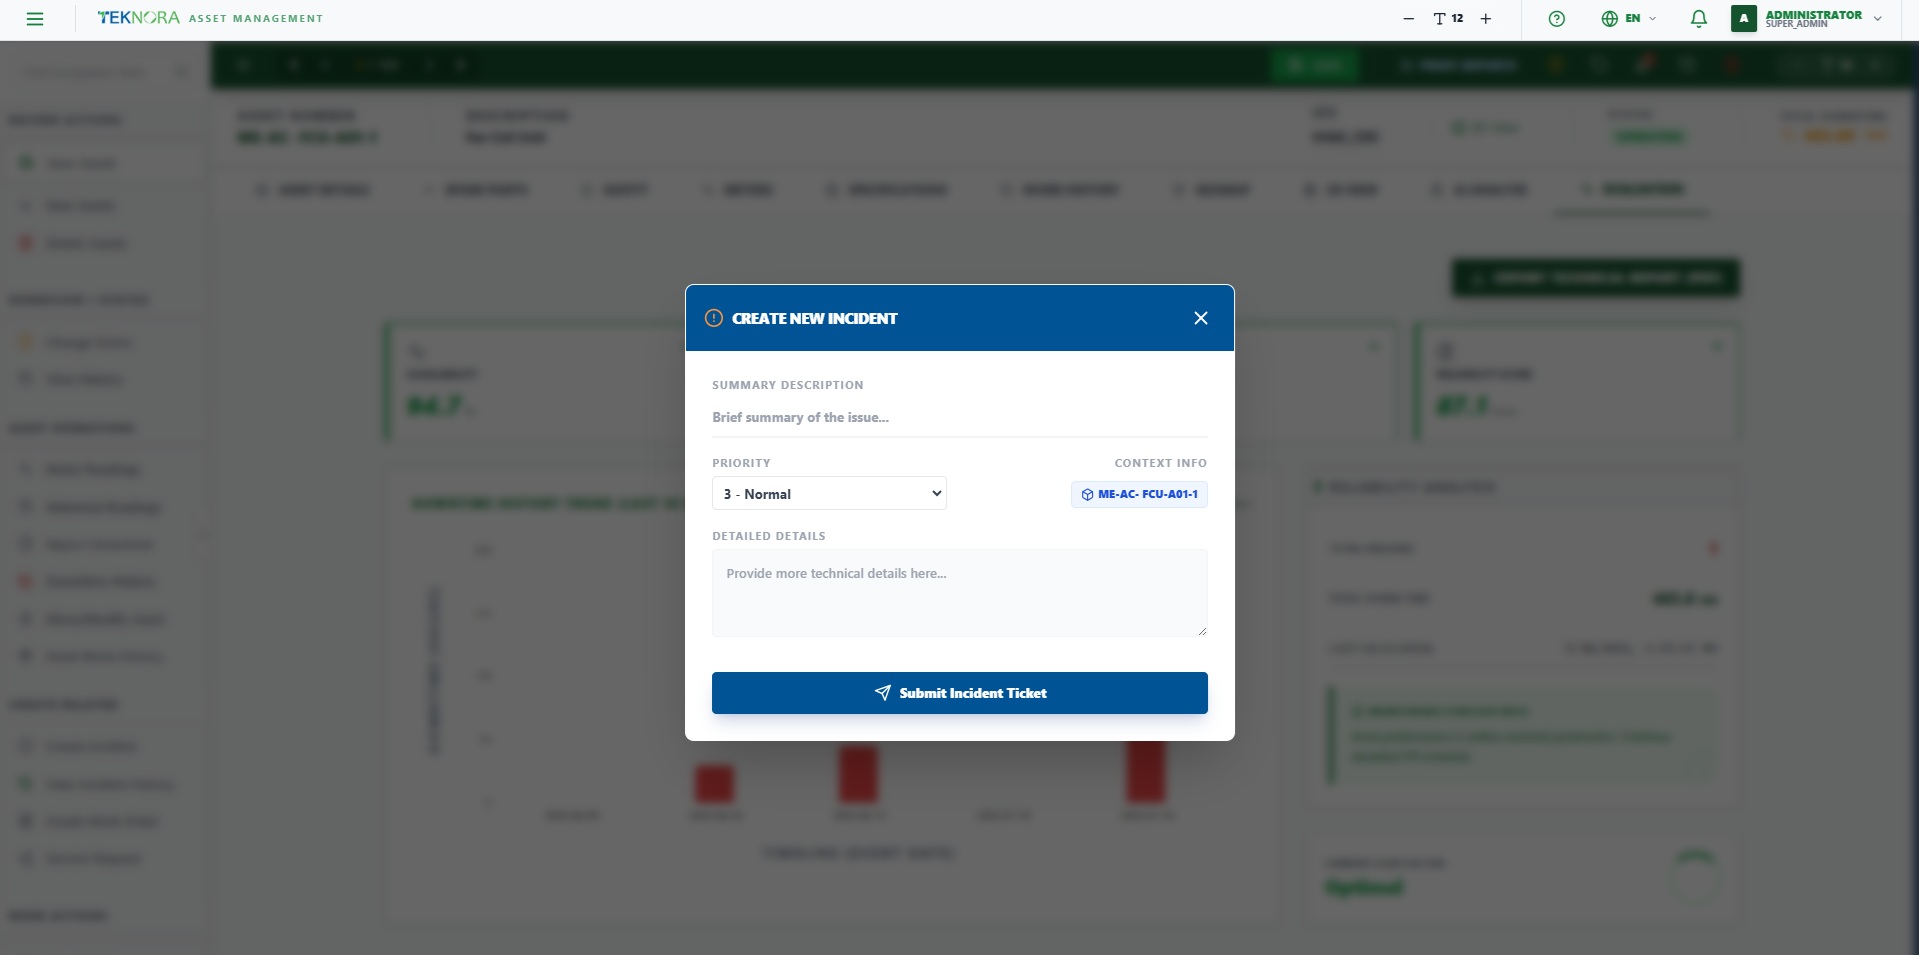
Create Incident: Log a safety incident or emergency report linked directly to this asset — automatically tied to the asset number.
Incident History: All incidents previously logged specifically on this asset.
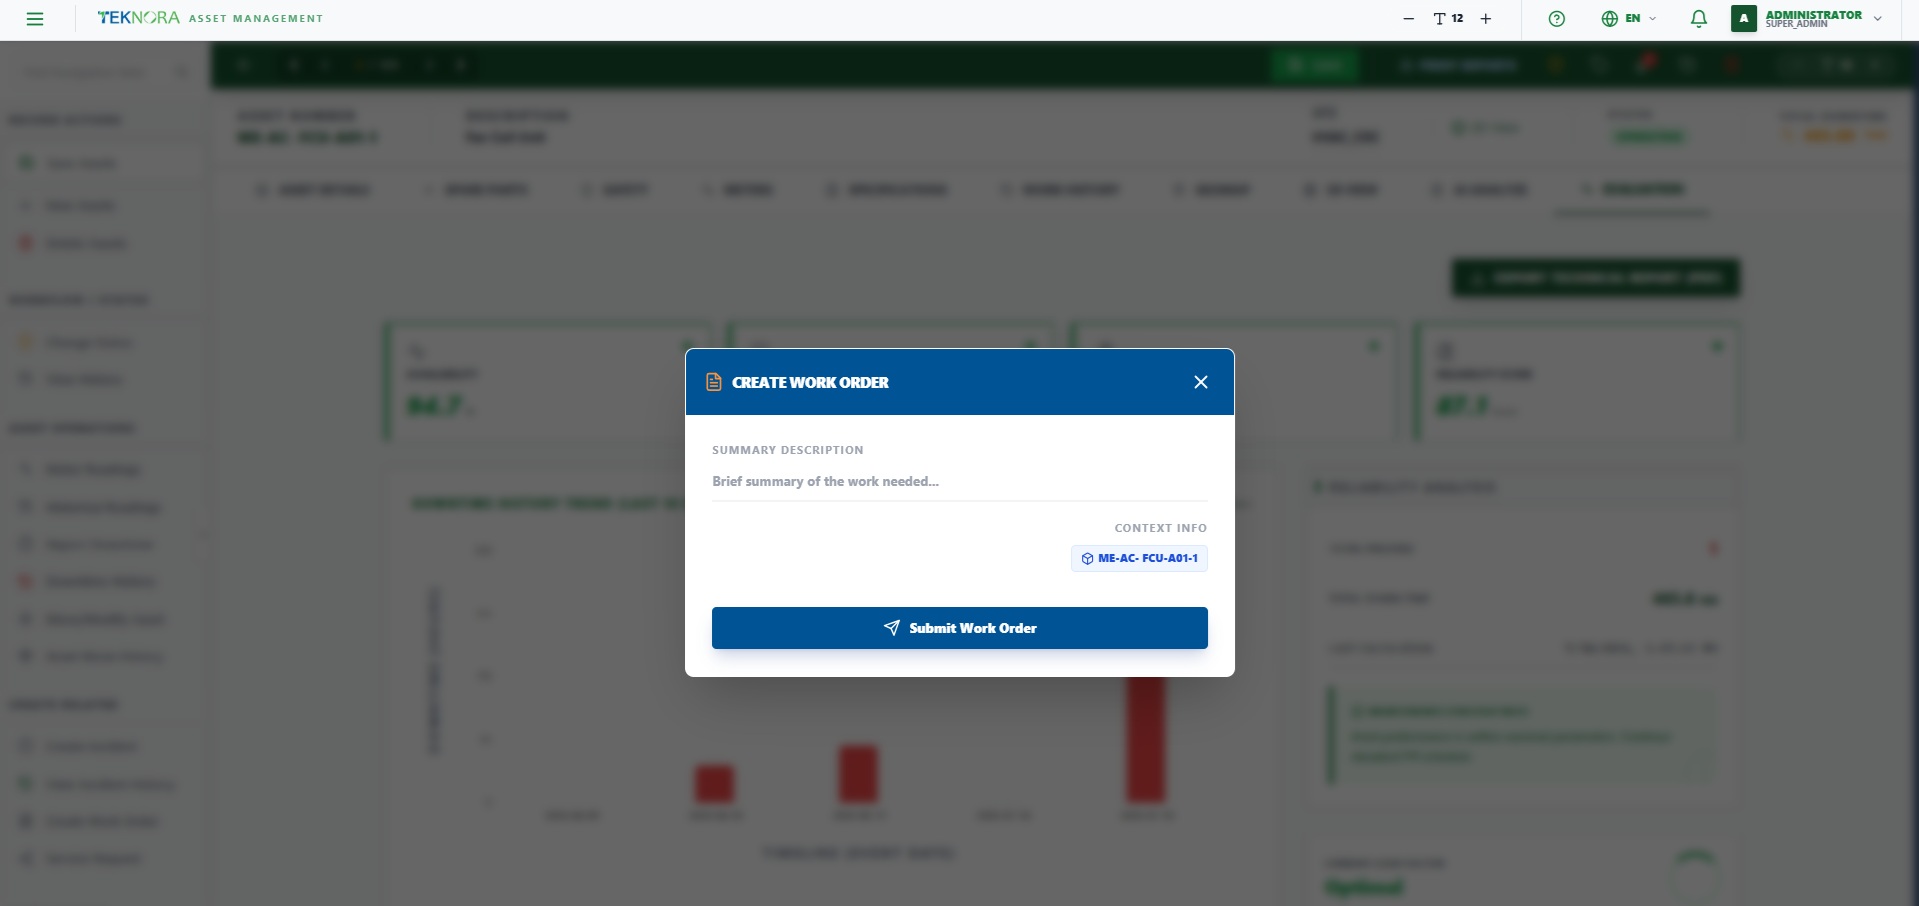
Create Work Order: Opens a quick window to create a new work order linked directly to the asset — the fastest way if you need immediate maintenance.
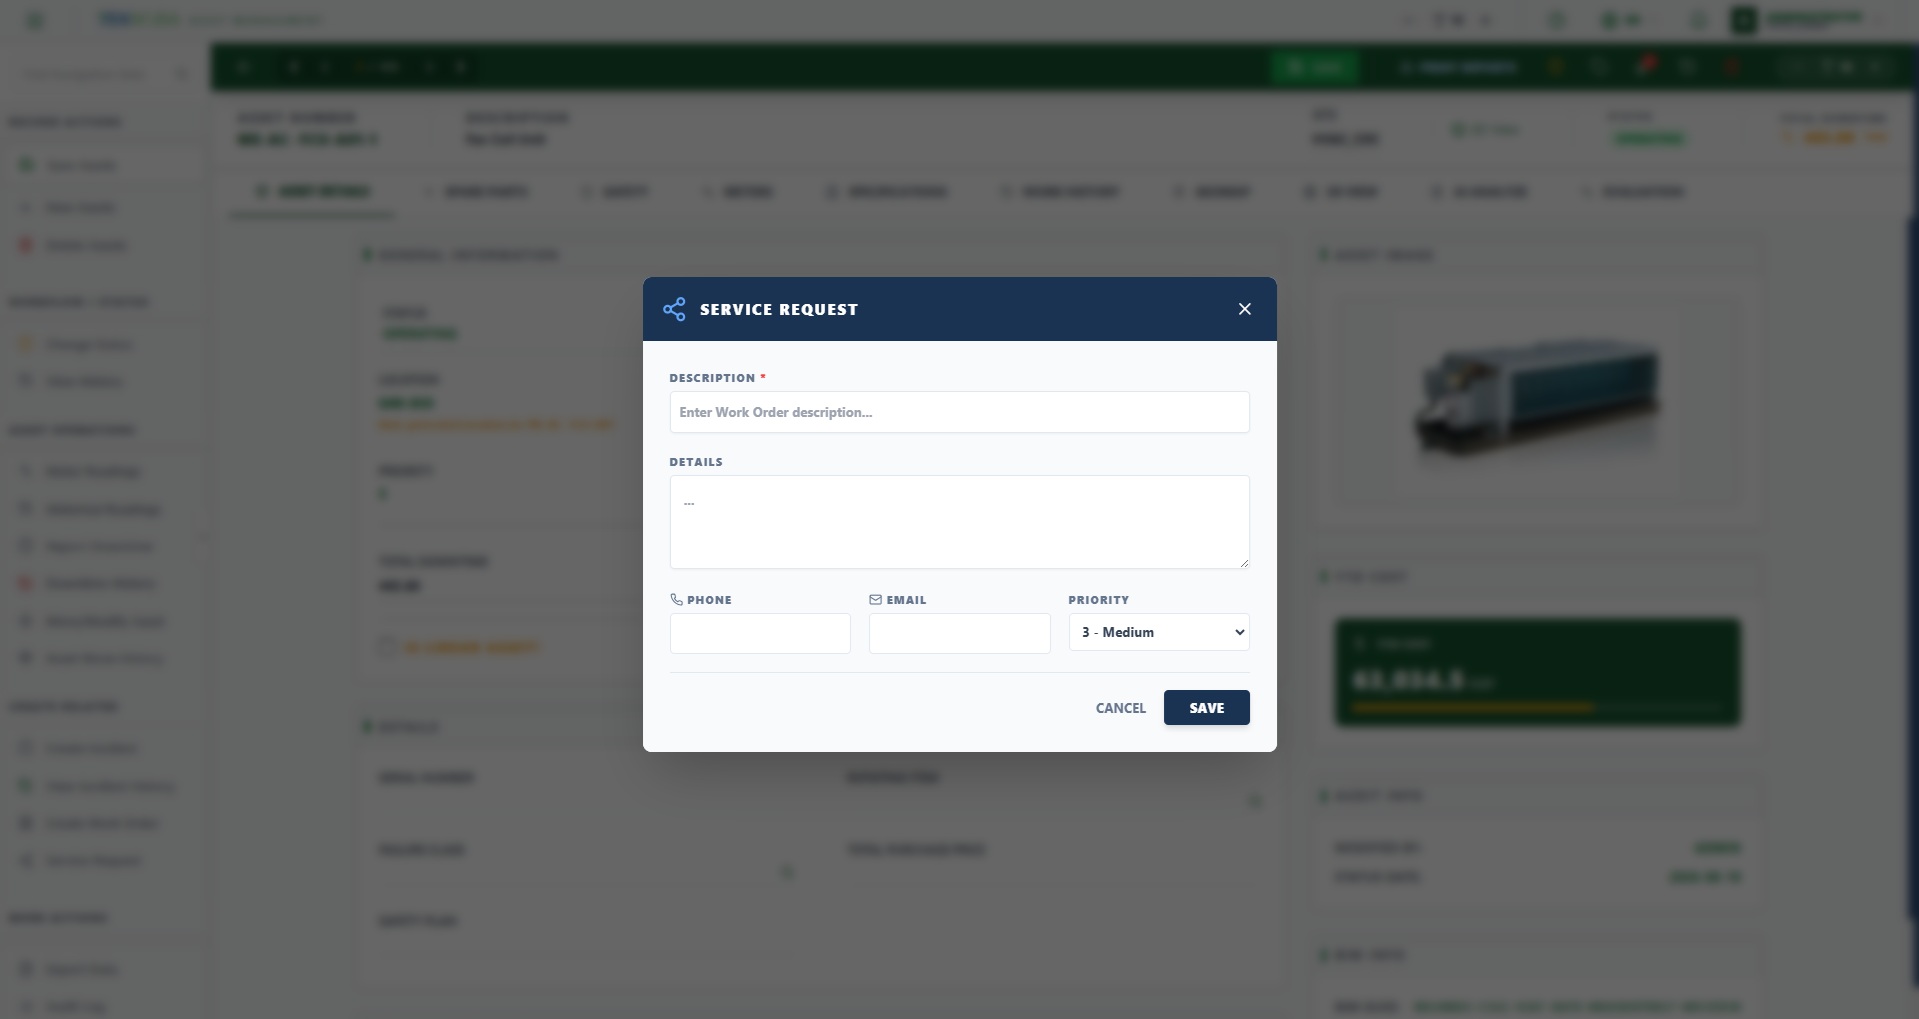
Service Request: Logs a service request linked to the asset — typically used for less urgent requests than a direct work order, or when the request comes from a non-technical user.
How to
1. Create a new asset
From the Asset Registry click New Asset, fill in the required fields (asset number, description, location), then click Save.
2. Edit an asset's data
Open the asset, edit the fields needed in any tab, then click Save at the top — saving covers all tabs at once.
3. Review the change history (Audit Log)
Click Audit Log on the top toolbar, or from the sidebar (More Actions → Audit Log). A table appears showing every change: who made it, when, and the difference between the old and new values.
4. Delete an asset
Click the Delete button (trash icon). You'll be asked to confirm. If the asset is linked to historical movements or work orders, the system refuses the deletion and suggests using Decommission instead, to preserve the historical record.
5. Upload an attachment (image/file)
Click the Attachments (📎) icon, then upload the required file. The red counter next to the icon shows the current number of attachments.
Before deleting
Deletion cannot be undone. If the asset is active or has an operational history, consider changing its status to DECOMMISSIONED instead of deleting it outright — this preserves the maintenance history and costs linked to it.
Back to: Asset Registry ←